In this tutorial, we are going to Create GeneratePress Notification Bar without a Plugin. Here, we are going to use Elements Module available in GeneratePress Premium Theme.
Also, in this guide, you will learn
- Make the notification bar sticky.
- Use Pure JavaScript to close the notification bar.
- GeneratePress Elements Module.
- So On …
Also Read: GeneratePress Review
In this tutorial, we are going to use CSS code to make the notification bar sticky, Elements Module, and Pure JavaScript to close the notification bar.
GeneratePress Notification Bar Features
- No jquery code.
- Only Pure JavaScript
- JavaScript is optional.
- Dismissable Notification Bar.
- Super-fast loading speed.
- The notification bar works on Mobile, Tablet, and Desktop.
- Can be used for Promotional Sales.
Create GeneratePress Notification Bar
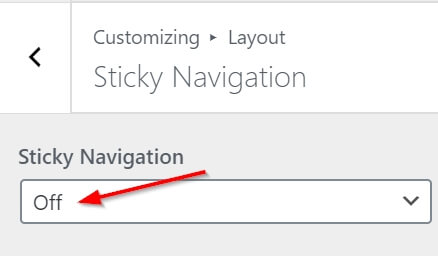
Before creating a notification bar, if you are using a sticky menu for the primary menu then you need to off the sticky navigation.
Go to Appearance > Customize > Layout > Sticky Navigation > Off
1. Add Message using Elements Module
Here, we are not going to use the top bar widget to create a dismissable notification bar but here we are going to use Elements Module’s Hook for this tutorial.
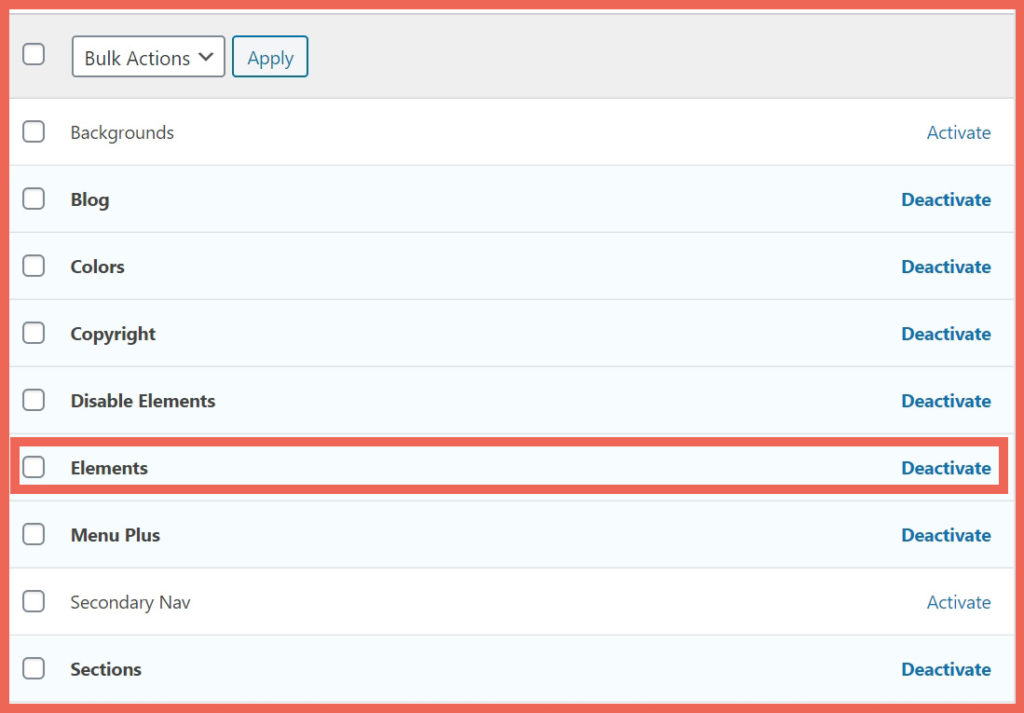
First, you need to enable Elements Module if you haven’t already. Go to Appearance > GeneratePress > Elements > Activate.
Now, Go to Appearance > Elements > Add New.
Choose Elements Type as Hook.

Copy and Paste the HTML code into the Hook Box.
<div id="wplogout-top-bar-notification">
	<div class="notice-inner grid-container">INSERT YOUR NOTIFICATION HERE!  <a href="ENTER YOUR URL HERE" target="_blank">INSERT YOUR LINK Text HERE</a><button id="wplogout-closebar" type="button">X</button>
	</div>
</div>
Now go to Hook Settings and choose the Hook as before_header or generatepress_before_header.

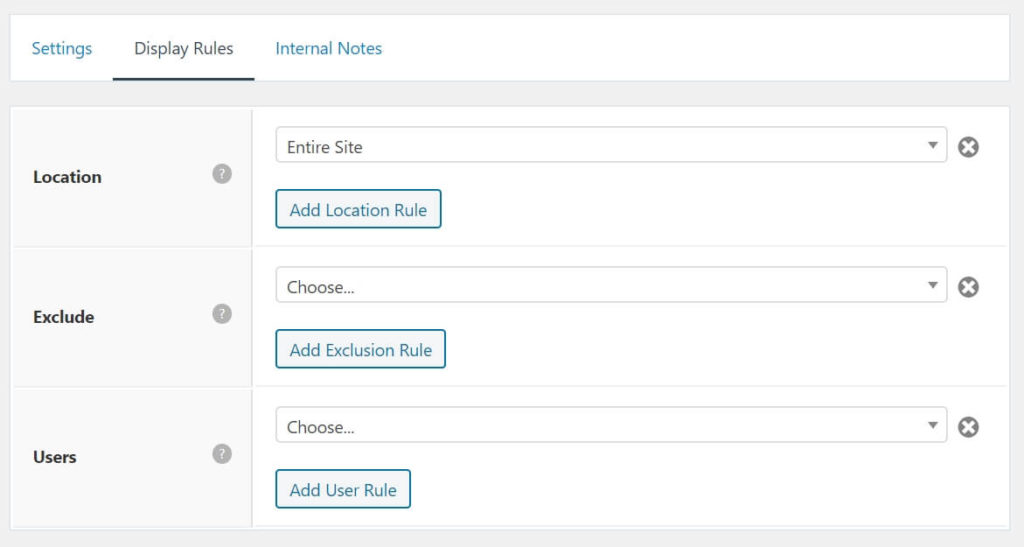
After that go to Display Rules and Choose Location as Entire Site.
Hit Publish Button.
Moreover, we need to add JavaScript code in the Hook Section. Please follow step 2.
2. Pure JavaScript to Close Notification Bar
Here we are not using any dependencies, here we are using Pure JavaScript which is super fast and doesn’t hamper your site loading speed. This code is used to close the notification bar i.e. to dismiss the whole notification area.
<script>
    document.getElementById("wplogout-closebar").onclick = function() {
        var z = document.getElementById("wplogout-top-bar-notification");
        if (z.style.display == 'none') {
            z.style.display = 'block';
        } else {
            z.style.display = 'none';
        }
    }
</script>
Now again go to Elements > Add New > Choose Element Type as Hook
Add a Hook Title.
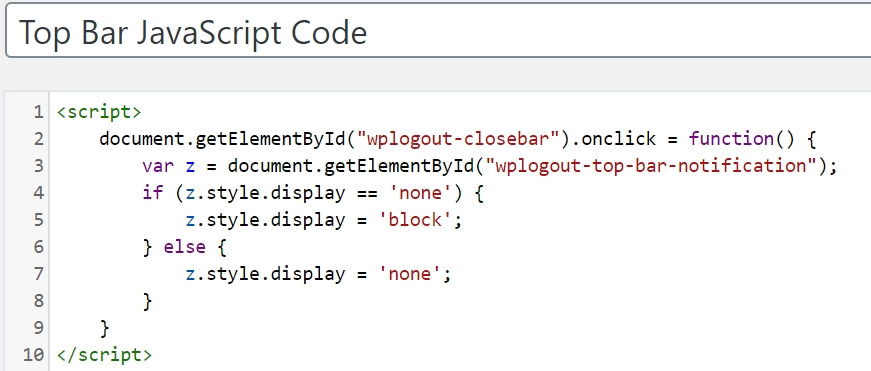
Copy the above JavaScript Code and Paste it into Hook Box
Now, go to Hook Settings and choose as wp_footer.

Moreover, go to Display Rules and Choose Location as Entire Site.

Hit Publish Button.
4. Style Notification Bar
Now, we are going to style our notification bar. Go to Appearance > Customize > Additional CSS. Copy and Paste the following code.
#wplogout-top-bar-notification {
    text-align: center;
    position: -webkit-sticky;
    position: sticky;
    top: 0px;
    z-index: 9999;
    border-bottom: 3px dashed #eaf1f8;
    background-image: linear-gradient(to left, #E100FF, #7F00FF)!important;
    color: #fff;
    font-size: 15px;
    padding: 7px 0px;
}

.admin-bar #wplogout-top-bar-notification {
    top: 32px;
}

#wplogout-top-bar-notification a {
    border-bottom: 2px dotted;
    color: #fff;
}

#wplogout-closebar {
    float: right;
    padding: 5px 9px;
    border-radius: 15px;
    background-color: #eee;
    color: #34495e;
    line-height: 1em;
}
5. Result
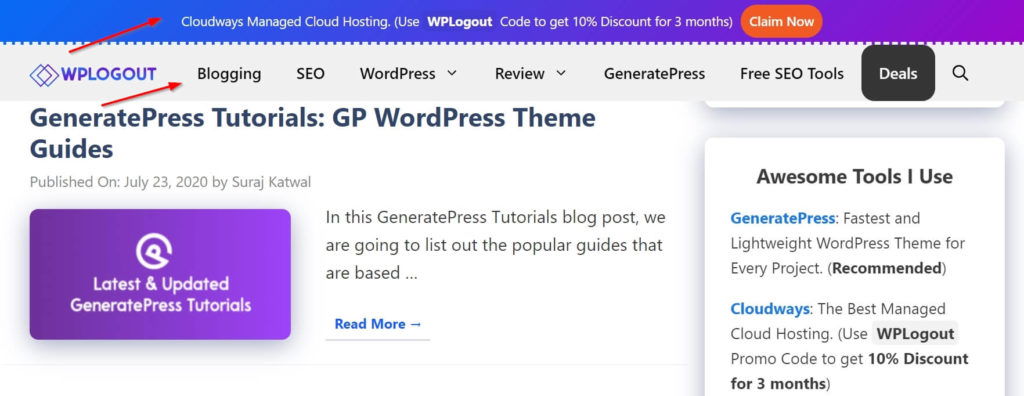
The Notification Bar in GeneratePress looks like this and you can change in colors of the notification bar.

Create GeneratePress Notification Bar with Sticky Primary Menu
What if you wanted both your Primary menu and notification bar to be sticky? Yes, you can do that but the problem is that you can’t create a dismissable notification bar since there will be a gap between the top area and the primary menu when you close the notification bar.
If you have a solution then you can comment below for this.
Moreover, we are going to follow the above tutorial so, before starting, make sure you have turned off the sticky navigation option as mentioned above.
Now follow the above tutorial completely except for the pure JavaScript code. Don’t use JS since we will not dismiss the notification bar.
Remove pure JavaScript Code from the above tutorial.
<script>
    document.getElementById("wplogout-closebar").onclick = function() {
        var z = document.getElementById("wplogout-top-bar-notification");
        if (z.style.display == 'none') {
            z.style.display = 'block';
        } else {
            z.style.display = 'none';
        }
    }
</script>
Also, Remove the close button from the HTML code.
<button id="wplogout-closebar" type="button">X</button>And, Remove CSS code.
#wplogout-closebar {
    float: right;
    padding: 5px 9px;
    border-radius: 15px;
    background-color: #eee;
    color: #34495e;
    line-height: 1em;
}
Now go to Additional CSS and Add this CSS code.
#site-navigation {
    position: -webkit-sticky;
    position: sticky;
    top: 75px; /*Change as your requirement*/
    z-index: 999;
}
Result
Conclusion
I was searching for the tutorial to create a generatepress notification bar and there were few solutions using jquery.
But I wanted a notification bar that doesn’t require any dependencies so here I used pure JavaScript, CSS code, and Elements Module to create a lightweight notification bar that loads super-fast and doesn’t load any external script. So, enjoy this notification bar tutorial, and also check out the latest GeneratePress Tutorials.
Moreover, you can use this approach in any other WordPress Themes by using code in header.php directly.
If you have any queries, please feel free to comment below.
Very nice tutorial! I love your content. Keep it up.
Thank you Micheal 🙂
Hey suraj
This is literally an amazing guide. I read other guides too about generatepress customization and applied some on my blog.
Here i want to ask you about the sidebar fixed widget. “RESOURCES I USE”
this widget is fixed while scrolling.. can you please share it how you do it in generatepress theme.
or you are using any plugin or something.
Kindly share if it is with gp elements.
looking forward to hear from you.
Cheers
Hi Mangesh, Please check this tutorial to make last widget sticky
Thanks
How can I create a button on the clickable link text?
Hi Sajjad,
You can use the anchor tag and manage style with CSS code.
Thanks
My result is different from yours, the button doesn´t appear.
Hi Ross, Please check your buttons settings from the customizer.
Thanks
I tried everything, this is the result I get: ibb.co/CJC1xrS
The central button doesn´t appear.
Hi Ross, Try this and also try to tweak the CSS code accordingly.
https://gist.github.com/wplogout/3816f582e998b1a3a4fe06c540f8f540
It works, thanks for answering so fast. Can you help me with CSS? I just have no idea how to do it.
Hi Ross, I have a customization service. If you need customization then you can request it.
Thanks
Been following your blog for a while and I have to say that I super love it!
Can you make the notification bar sticky on the screen, please?
Thank you a lot!
Hi William,
In this tutorial, you can find a sticky tutorial too.
Thanks
Hey, once again your tutorials ride tot he rescue! I just added a sitewide Black Friday link to my sight and it was so easy and it looks great. Thanks again. You’re the man Suraj!
Thanks Ian 🙂
Hello Suraj. Thanks for the great tutorial. Just wondering how I can create the same notification bar like the one you are using on this site such that it is not sticky? Tried using the ones here you shared here: https://gist.github.com/wplogout/3816f582e998b1a3a4fe06c540f8f540/ and they look great the problem is they are sticky. Could you kindly share a code that will produce something similar to yours! Thanks
Awesome tutorial! I like your stuff. Keep it up.
I would like to have the CSS code of your site if you can. If you will take money for this, then please reply, and you can give it for free, then write a video or blog on GeneratePress Customization, thank you.
Hi Sarif,
I provide customization services, you can contact us for it.
Thanks
Hi Bro,
Button is not showing. Can you help me.
Thanks
Hi Suraj!
Thanks for this! Works super!
🙂
🙌
Thanks
This is great, thanks! It works very well. I would like to be able to not show it again for some period of time, for example 7 days, after the user closes it. Is this possible?
Thanks.
Hi Aaron,
You need to play with JS for that.
Thanks