In this WP Rocket Tutorial, we will configure the WP Rocket plugin and speed up WordPress websites. WP Rocket is a premium caching plugin for WordPress that helps boost overall site performance.
With the rise of Core Web Vitals, speed is one of the ranking factors, as an SEO Factor, your site needs to be fast enough to rank in Search Engine Result Pages (SERPs).
Moreover, in this tutorial, you are going to learn more about
- Overview of WP Rocket
- Configuration for new users.
- Critical CSS, Minification & Database
- Lazy loading images and iframes.
- List of alternative plugins.
- So on…
What is WP Rocket?
WP Rocket is a caching plugin for WordPress that helps to increase your website’s speed without needing any technical skill to install and configure the plugin. It is popular among bloggers and developers.
Why Speed Matters?
Having a fast website is very important for two main reasons:
- It helps your website rank better on search engines like Google. Search engines want to show the best, fastest websites at the top of the search results. Slow sites get lower rankings.
- It provides a better experience for your visitors. People don’t like waiting a long time for a web page to load. If your site is slow, visitors are more likely to leave and go somewhere else.
WP Rocket Tutorial – Settings
Most of you know that WP Rocket is a premium tool to speed up WordPress websites. With this WP Rocket Tutorial, we will try to cover all possible settings to meet the core web vitals requirements.

Moreover, I have been using the WP Rocket Caching plugin for a few years and it is making a difference in speeding up my website.
Let’s explore what’s inside this powerful plugin.
1. Dashboard

In the Dashboard section, you can see the License type and Expiration date. On the right sidebar, you can see these Quick Options.
- View your license information and expiration date.
- Utilize quick options like Clear Cache, Clear Used CSS.
Remove all Cache Files: If you want to purge the cache then you can use this option.
Remove Used CSS Cache: Use this option to clear Used CSS.
2. Cache
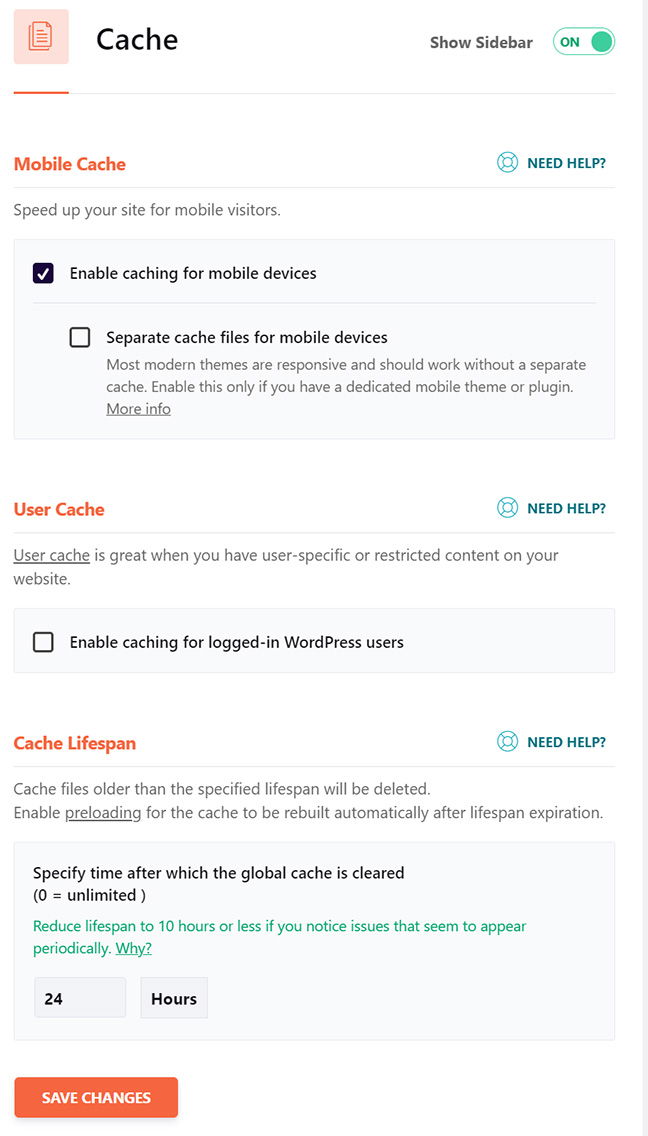
Mobile Cache: Enable Mobile Cache to Enable caching for mobile devices.
Enable Separate cache files for mobile devices only if you are using a different theme for mobile versions but you don’t need to enable it as most of today’s modern themes are responsive by default.
User Cache: Enable User Cache if and only if you have user-specific or restricted content.
Cache Lifespan: The lifespan of the cache will get deleted after a specific period. The time period can be set in hours and here 0 means the cache remains for an unlimited time period.
3. File Optimization
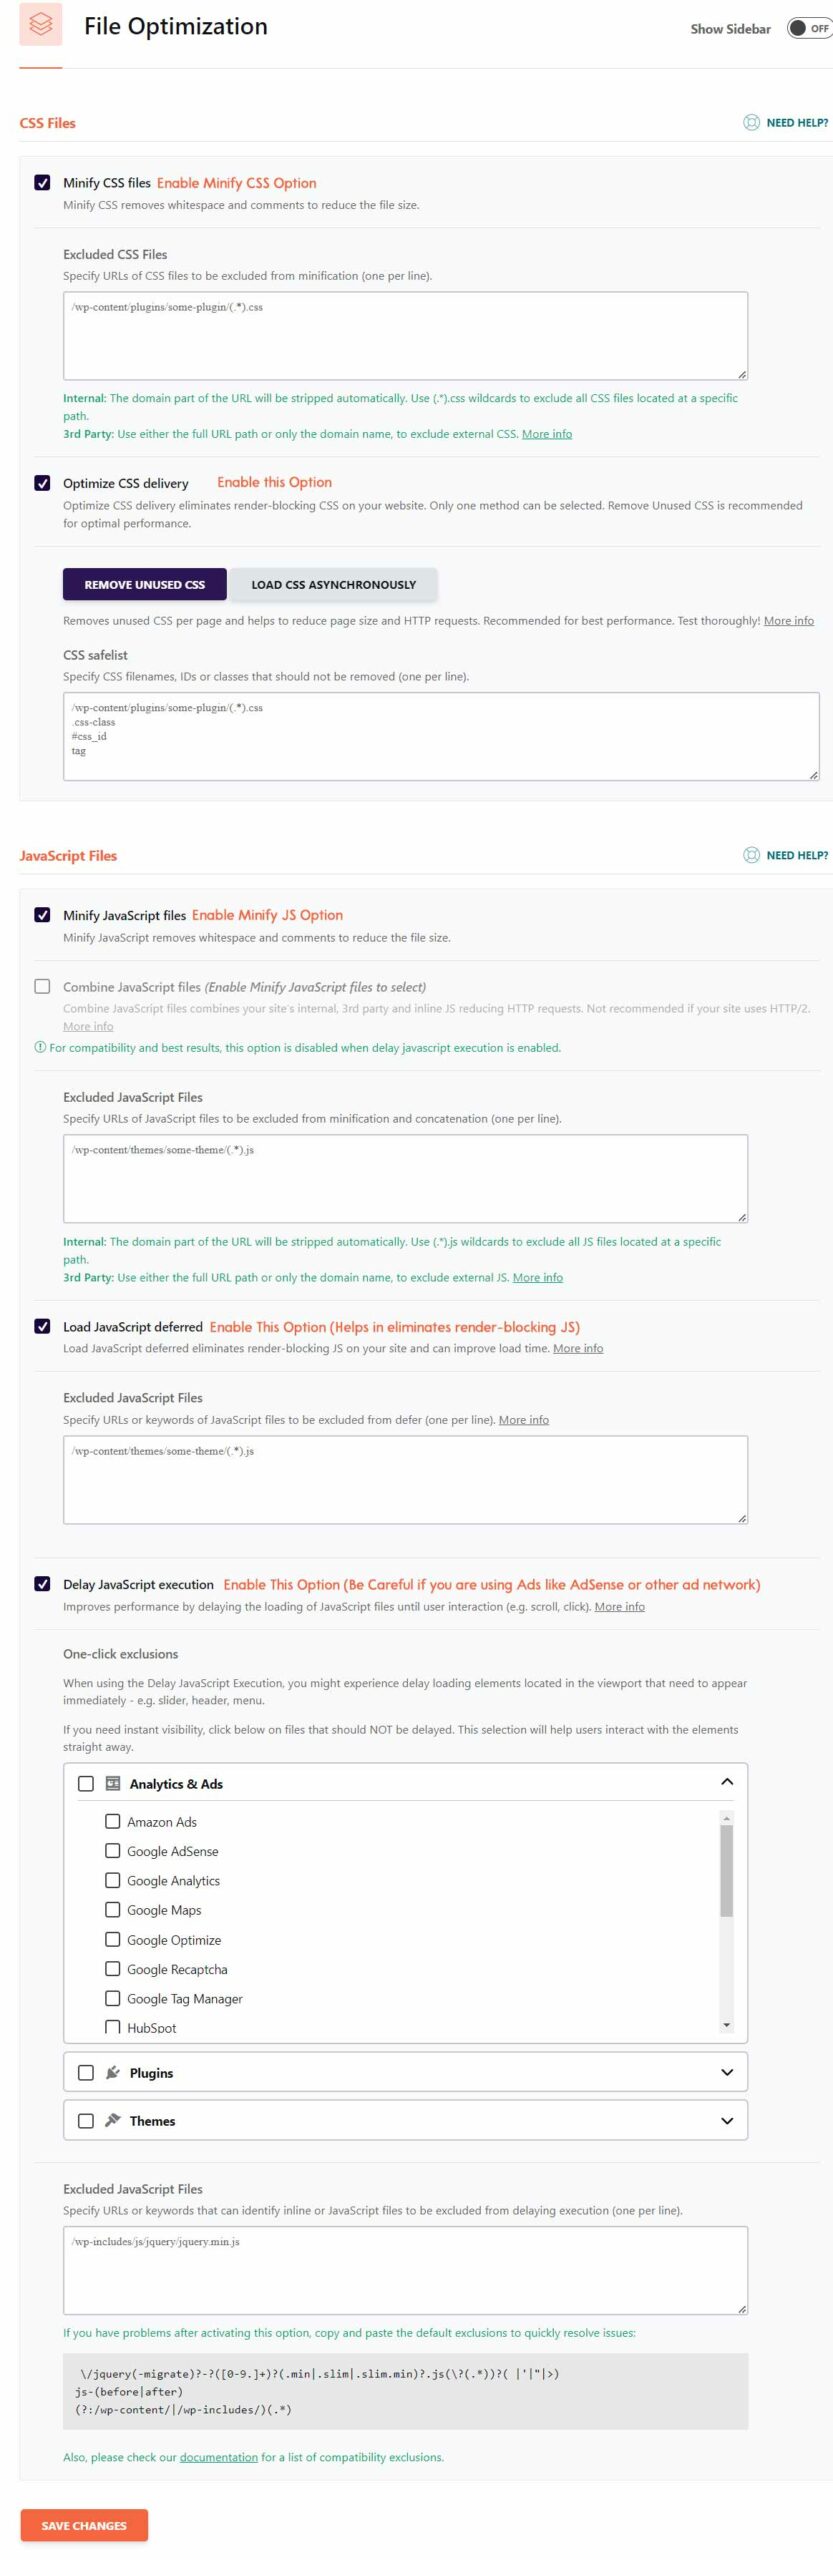
Minify CSS files: Remove white spaces and comments to reduce the size of CSS files.
Optimize CSS Delivery: Generate critical path CSS for faster initial rendering and load remaining CSS asynchronously. (Enable it)
Minify JavaScript files: Remove white spaces and comments to reduce the size of JS files. (Enable it)
Combine JavaScript files: Enable the Minify JS option first and then WP Rocket will enable or disable based on the compatibility with the delay JavaScript execution option.
Load JavaScript deferred: Load JavaScript deferred helps to eliminate render-blocking JS on your site and can improve load time as well as fix the issue in Google Page Speed Insights.
Delay JavaScript execution: The recent version of WP Rocket has a feature to delay the JavaScript execution. It is one of the best features if you want to delay the time period of JavaScript until user interaction. Just like in this option, you can delay AdSense Script, Facebook Pixel Script, wpdiscuz, font awesome, etc.
Be sure to use it wisely, basically while delaying Google AdSense Script, it may impact your revenue.
4. Media

- Lazy Load: Basically lazy loading option here helps to improve by loading time when the user is about to enter or on the viewport. Enable it for Images to lazy load images, CSS Background Images, and Enable iframes and videos to replace video by thumbnail.
- Image Dimension: Fix Image Elements do not have explicit width and height issues by enabling Add missing image dimensions.
5. Preload
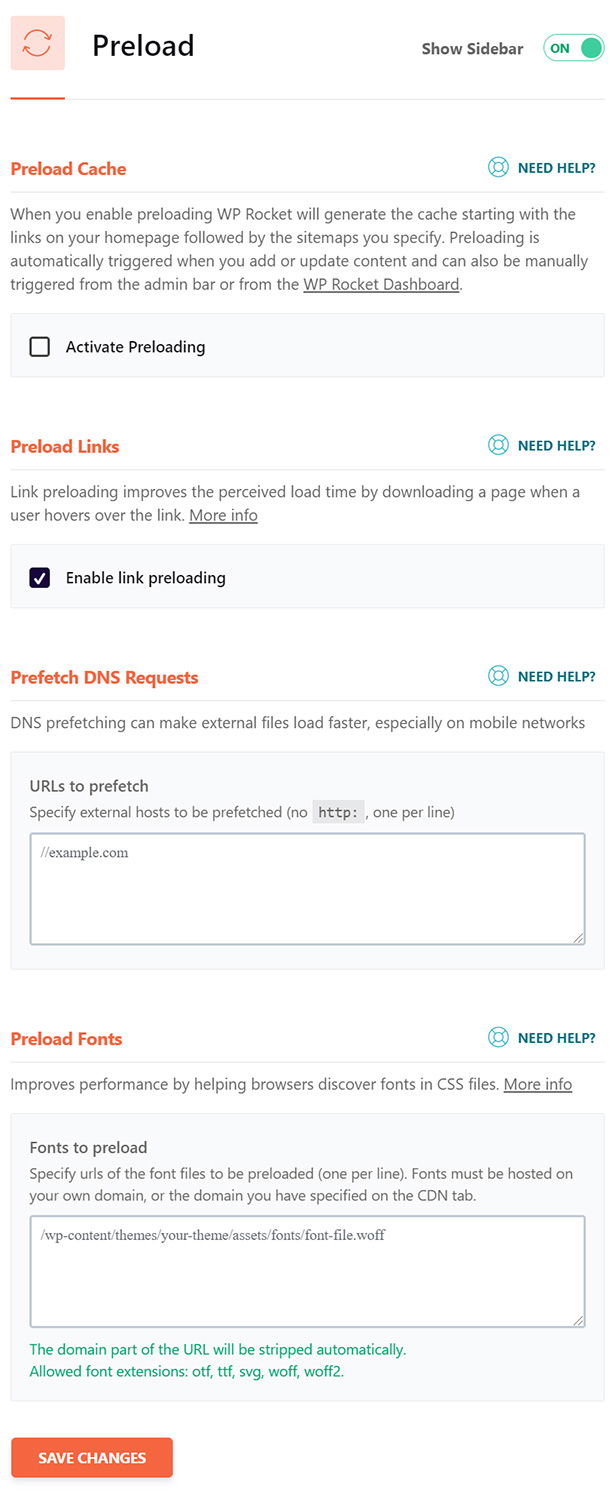
Preload Cache: Preloading generates the cache from the link starting in the sitemaps. Disable this option if you have lots of pages.
Preload Links: One of the best features in WP Rocket is Link Preloading, Link Preloading speeds up the page by downloading it when users hover over the link.
Prefetch DNS Requests: Load external sites faster by prefetching DNS, here you can prefetch Jetpack, buysellads, gravatar, Disqus, font-awesome, Blogspot, and so on…
Preload Fonts: Preload fonts that are specified in CSS files. OTF, TTF, SVG, WOFF, and WOFF2 are the font extensions supported by WP Rocket. The fonts must be locally hosted or specified in CDN.
6. Advanced Rules
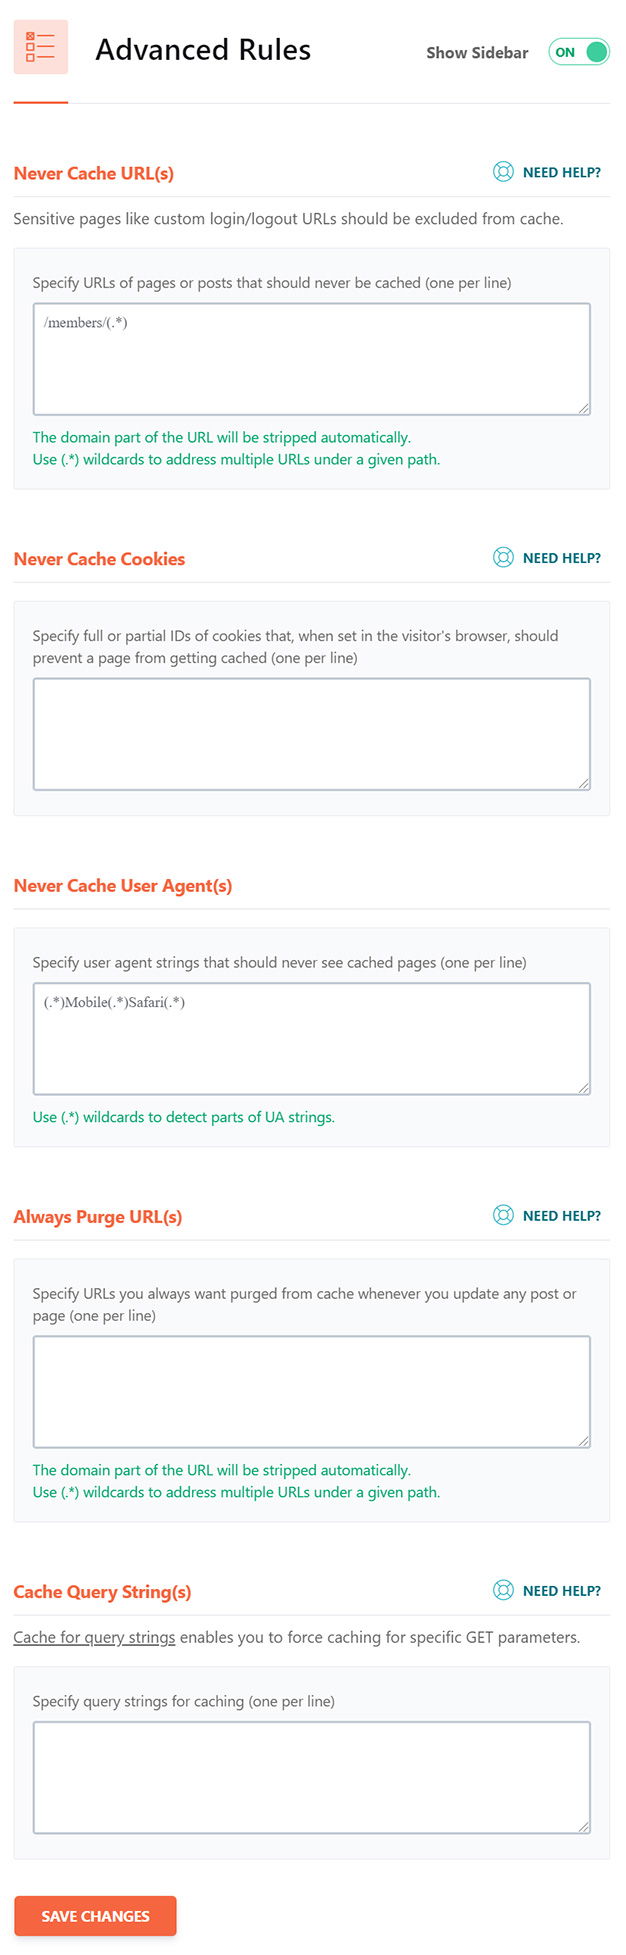
Never Cache URLs: If you are using custom login, cart, customer, checkout pages, etc then use this option to exclude URLs that should never allow to cache.
Never Cache Cookies: Insert one cookie per link which should never cache the cookies.
Never Cache User Agents: User Agents are generally bots, Exclude those that should never be cached.
Always Purge URLs: Specify the URLs that should always be purged when you publish, edit, or update your content or website.
Cache Query Strings: This advanced setting helps to cache the query strings.
7. Database
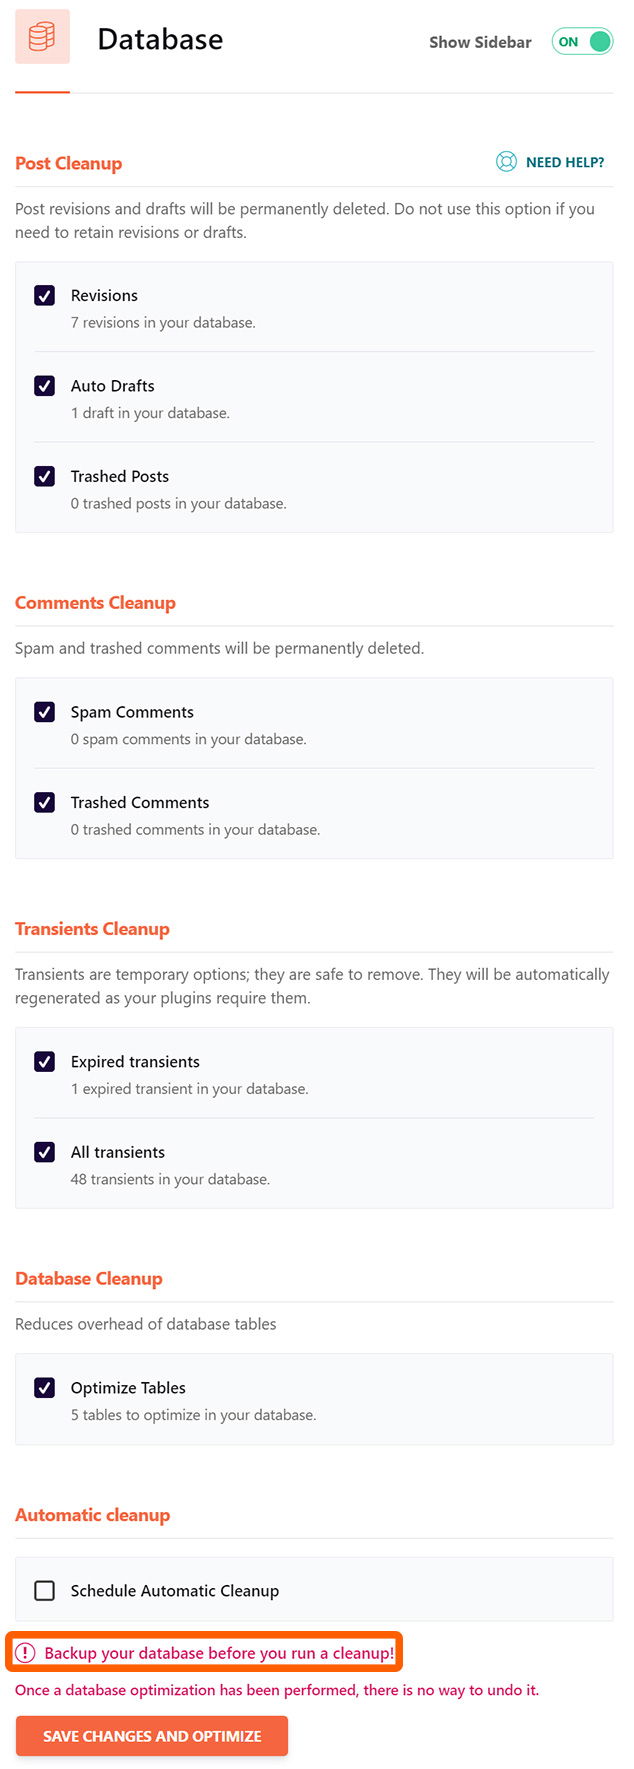
- Post Cleanup: When you are working on your content, you may have an older version of your post, or may have auto drafts. Clean it up.
- Comments Cleanup: Clean up spam or trashed comments.
- Transients Cleanup: Transients are basically temporary files. Clean up these files regularly with WP Rocket.
- Database Cleanup: Clean up the database where your site might have useless data tables.
- Automatic Cleanup: Schedule your database to run cleanup automatically.
8. CDN
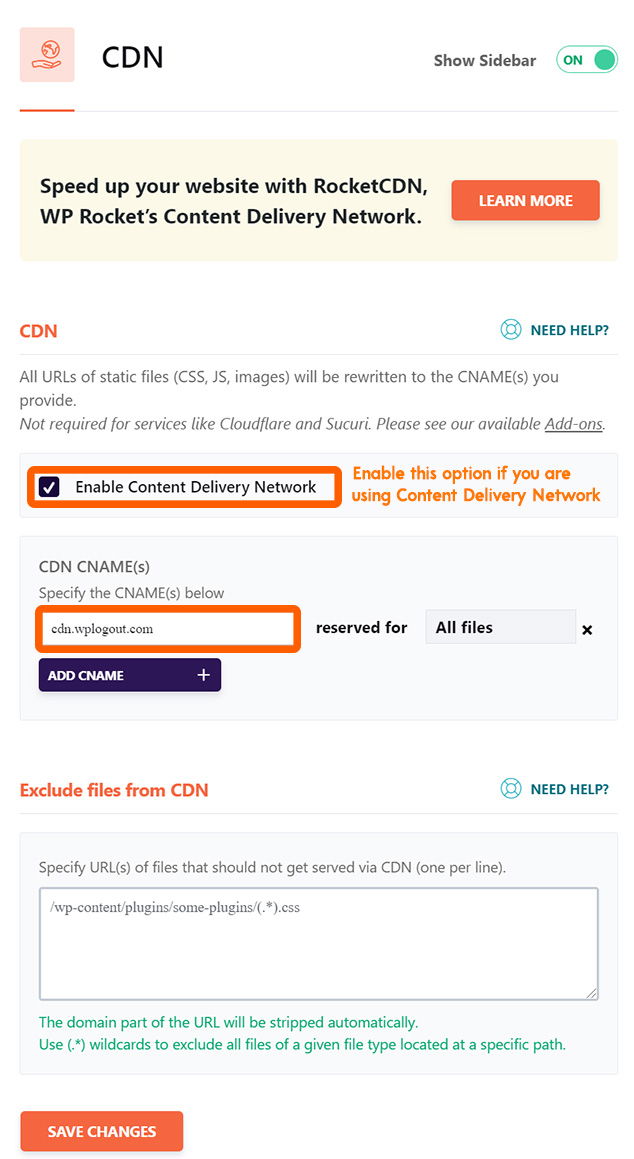
Implementing CDN helps to make your website faster globally by replicating your content to the local server from the origin server.
Here, WP Rocket offers RocketCDN to its users and the price starts from $7.99 / month which is quite expensive in my opinion.
If you are looking for an alternative CDN to set up on your site then there are many alternatives to Rocket CDN like Bunny CDN, Cloudflare, etc.
Personally, I have been using Bunny CDN and recommending it to my visitors. It helps to boost site speed with < 30 ms global latency.
Use WPLOGOUT promo code to get a $5 credit and get started with Bunny CDN.
You can find a complete setup tutorial in this BunnyCDN Review article, please check it.
9. Heartbeat
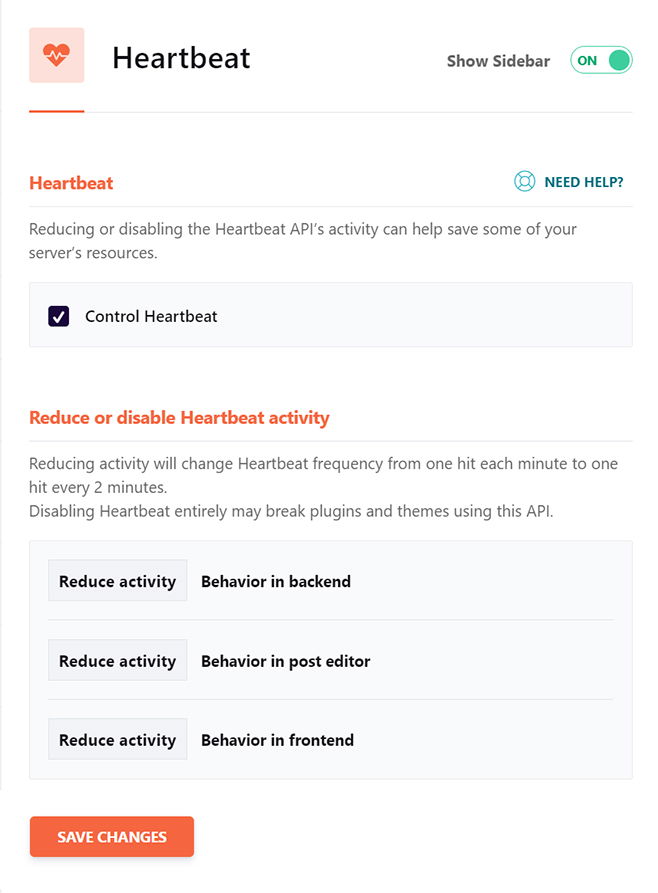
Reducing or controlling heartbeat helps to save the server resources i.e. it helps to save CPU usage and save bandwidth.
So, here enable the Control Heartbeat option and hit save changes.
10. Add-ons
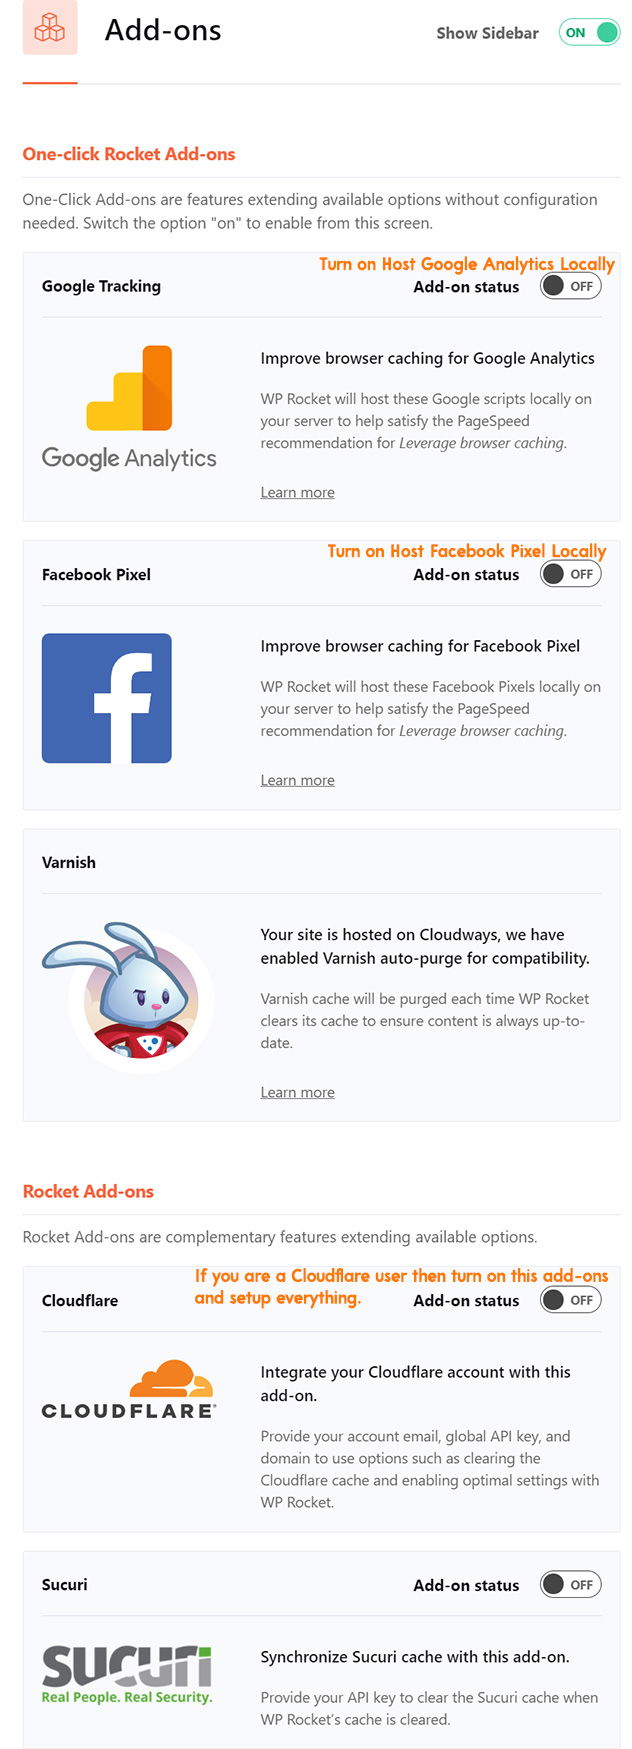
In this WP Rocket Tutorial section, we are going to look after the Add-ons section.
If you want to fix the leverage browser caching issue in GTMetrix then One-click Rocket Add-ons help to improve browser caching.
- Varnish: WP Rocket helps in purging the varnish cache automatically. Make sure your host is compatible with WP Rocke to use this feature.
- WebP Compatibility: If you are serving images in the form of webp then enable this option.
Rocket Add-ons: If you are a Cloudflare and Sucuri user then try turning on the additional Rocket Add-ons features.
Generally, for the Cloudflare setting, first, to integrate it in WP Rocket you need your Cloudflare email, Global API key, and domain.
For Sucuri, you just need to provide an API key to synchronize the Sucuri Cache.
11. Image Optimization
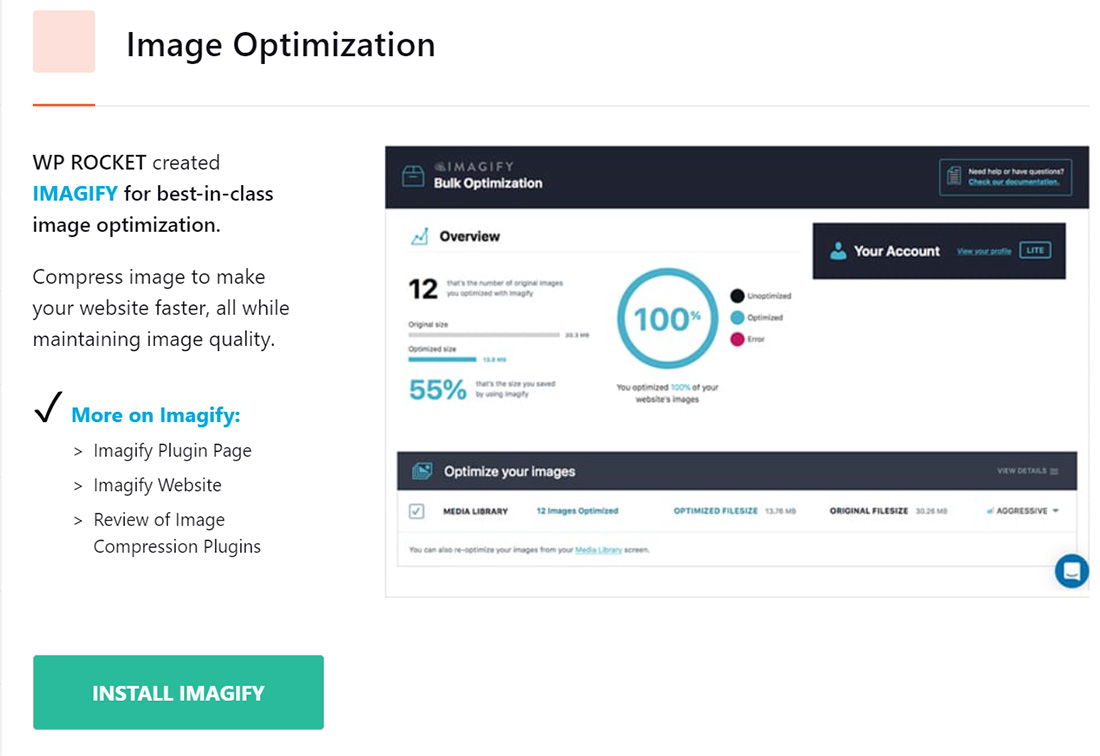
WP Rocket has its own image optimization plugin called Imagify that helps to compress images for a faster website.
I generally optimize my images before uploading them to my site by using online tools like Squoosh, TinyPNG, etc. I also use Bunny Optimizer to serve all images to WebP.
Alternatively, for optimization, you can use Imagify. RocketCDN has recently partnered with Bunny CDN to accelerate your website by compressing images and saving bandwidth.
12. Tools

Under the Tools menu, you can find Export, Import, Rollback settings, etc.
- Export Settings: If you want to share your WP Rocket Settings with others then you can simply export the settings.
- Import Settings: So basically, when someone offers you the WP Rocket settings then you can import those settings to your site.
- Rollback: This feature helps to roll back to the previous version from the current version.
- Enable Google Font Optimization: Optimize Google Fonts for faster loading by preloading essential fonts and subsets.
- Update Inclusion and Exclusion Lists: Manage which resources are preloaded, prefetched, or excluded from optimization.
13. Tutorials
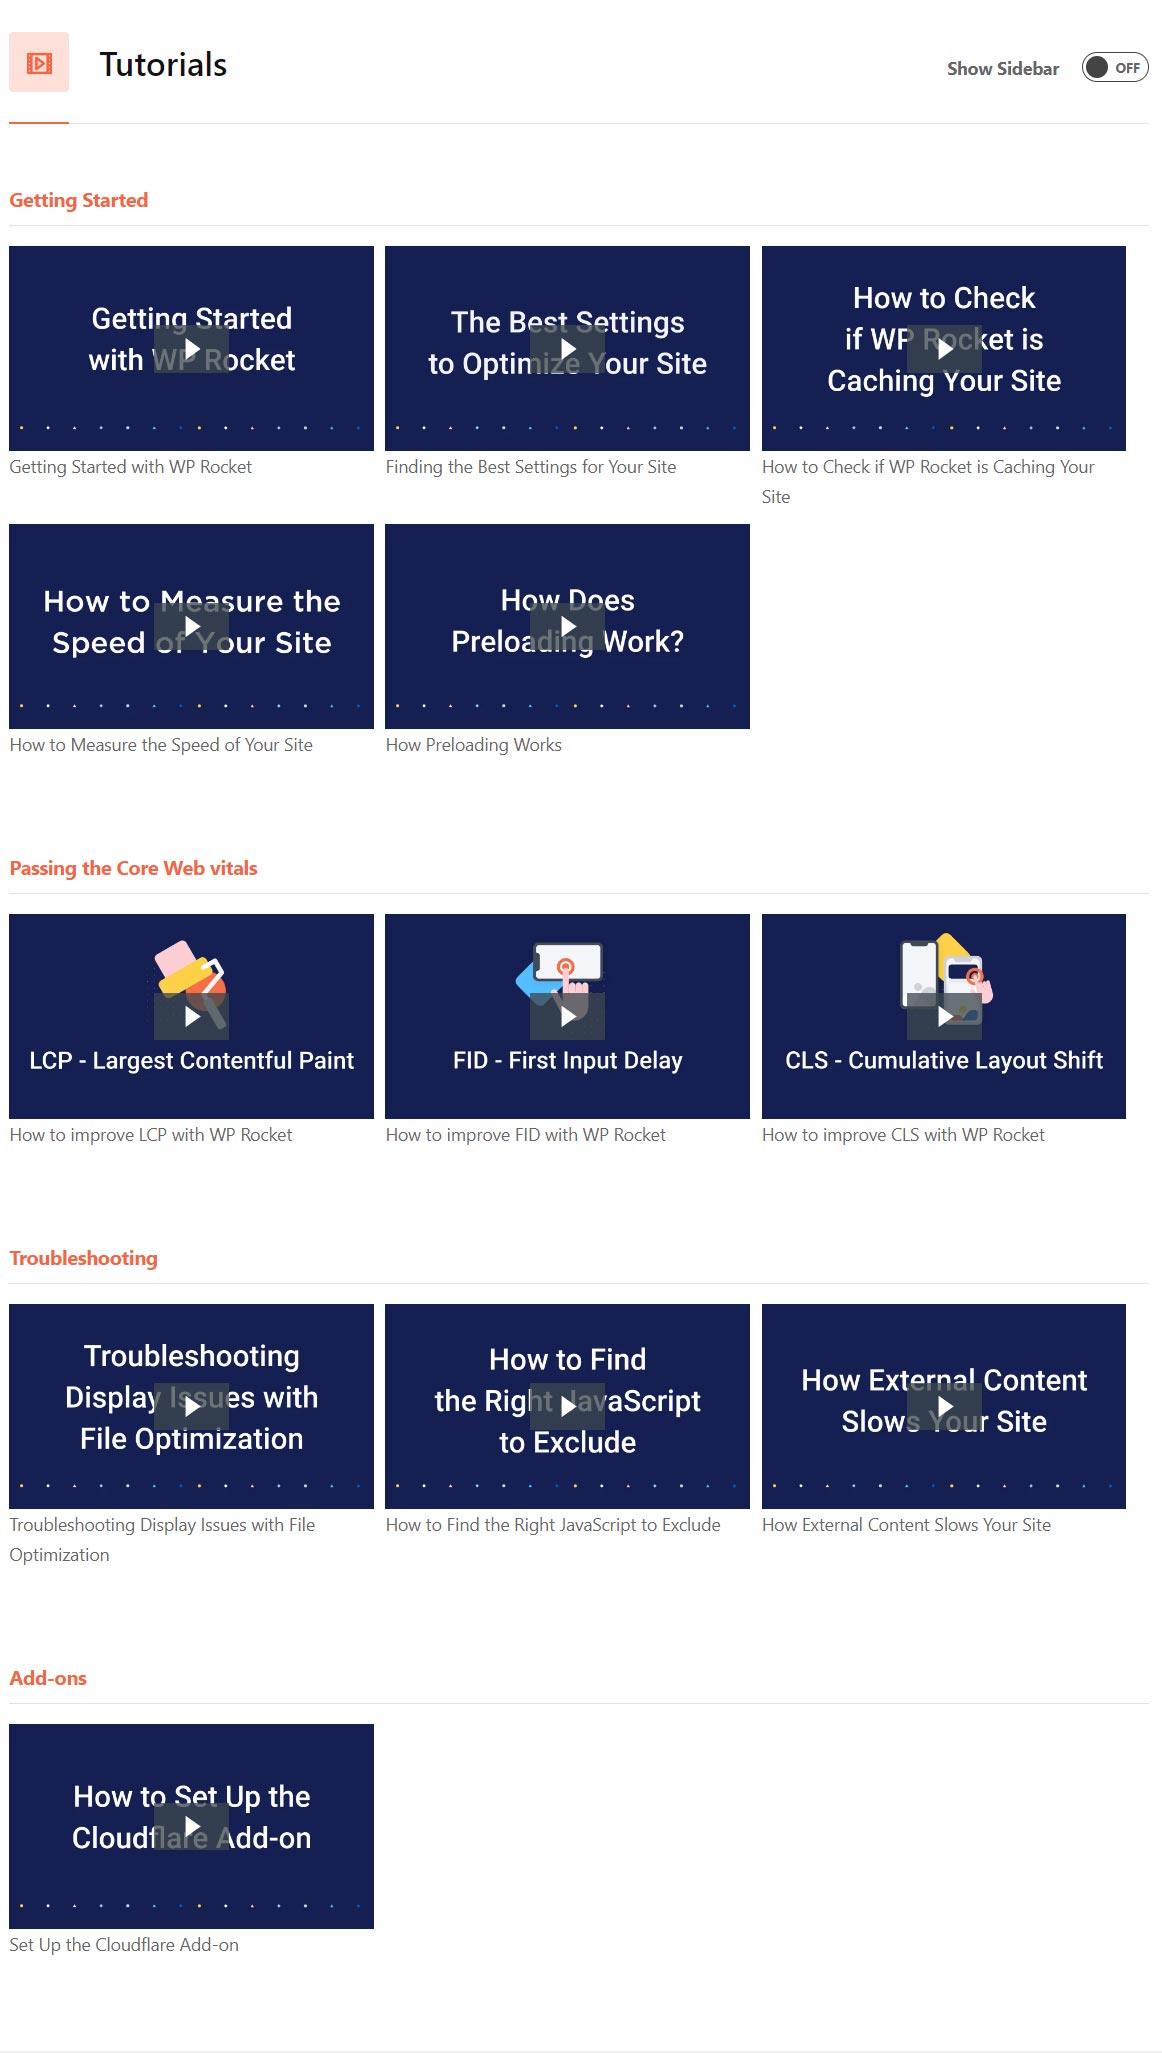
In this last menu section, you can find various video tutorials regarding the WP Rocket plugin like the best settings for the site, measuring the speed of the site, file optimization, preloading, add-ons, etc.
Summary
In this WP Rocket tutorial, you have learned to configure and set up a paid WP Rocket WordPress plugin.
After migrating from a bloated theme to GeneratePress, shared hosting to Cloudways, implementing BunnyCDN with Bunny Optimizer, and optimizing my WordPress site with WP Rocket.
I am able to achieve a good score in speed testing tools like Google Page Speed Insights, GTMetrix, etc.
Even though I am not obsessed with the score, the site should be fast enough for visitors and meet the requirements for Core Web Vitals.
Remember, focus on a good user experience, not just achieving perfect scores.
After reading this article, I hope you will try WP Rocket to speed up your WordPress site.
And, some of the bloggers are asking about my blog setup.
WPLogout is powered by
- GeneratePress Premium Theme.
- GenerateBlocks Plugin.
- BunnyCDN with Bunny Optimizer.
- WP Rocket Caching Plugin.
- Cloudways Hosting Platform.
If you are searching for exclusive deals, you can check my deals page to get exclusive coupons including WP Rocket.
Another interesting plugin for image optimization: wordpress.org/plugins/optipic/ Its automatic convert image to Webp (for webp-supported browsers) and compressed/optimized png/jpeg (for webp-unsupported browsers).
Thanks for Sharing
Nice Tutorial
Thanks
How did you create your site logo.. I tried almost everything but I couldn’t do anything !! 😢😢
Hi Devid,
I am using Adobe Illustrator to create the SVG logo.
Thnks
one question, can i have the image css box shadow code like yours
Yes, you can!
Are u using any plugin for breadcrumb? I couldn’t see any option for breadcrumb in generate press theme. Right now I’m using Yoast breadcrumb but its showing after heading 1 and I want to show before H1 just like urs.
Hi Naveneet,
You can find my tutorial regarding breadcrumbs in GeneratePress in my blog.
Please check
Thanks
hello sir i need this delay java script good .i can not find can you semd me on my email
Hi Faisal,
Under the File Optimization Menu, you can find it.
Thanks
How to get drop shadow under images an right side bar widgets.
Please make a tutorial