Take a look at the detail of BunnyCDN Review, a lightning-fast, and affordable Content Delivery Network to speed up your website.
Basically, we will review various aspects of BunnyCDN including Data Centers, Performance, Comparison with other CDNs, Pricing, Support, Documentation, etc.
Moreover, In this review, you will also learn more about
- BunnyCDN Features.
- Pricing for different regions.
- How to install BunnyCDN in WordPress?
- Global BunnyCDN performance.
- So On …

What is Bunny CDN?
Bunny CDN is a performance-based company based in Slovenia founded in 2015 by a group of skilled and passionate teams with 10+ years of experience in the field of CDN and other technology.
BunnyCDN is a lightning-fast CDN with the most affordable pricing that helps to speed up your website globally.
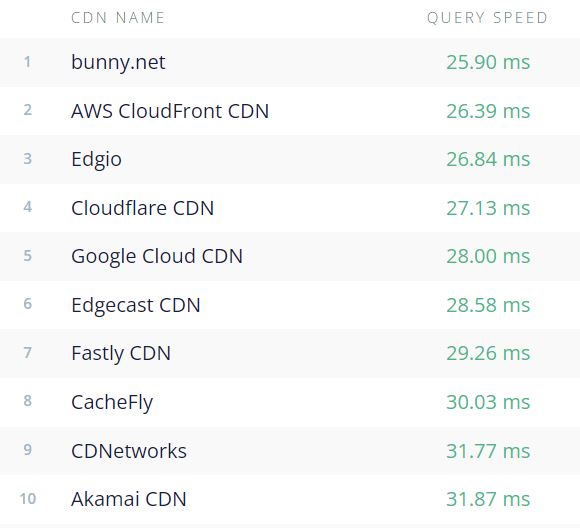
With high competitors with companies like Cloudflare, and KeyCDN. BunnyCDN is here to help make your site faster with < 29 ms global latency.
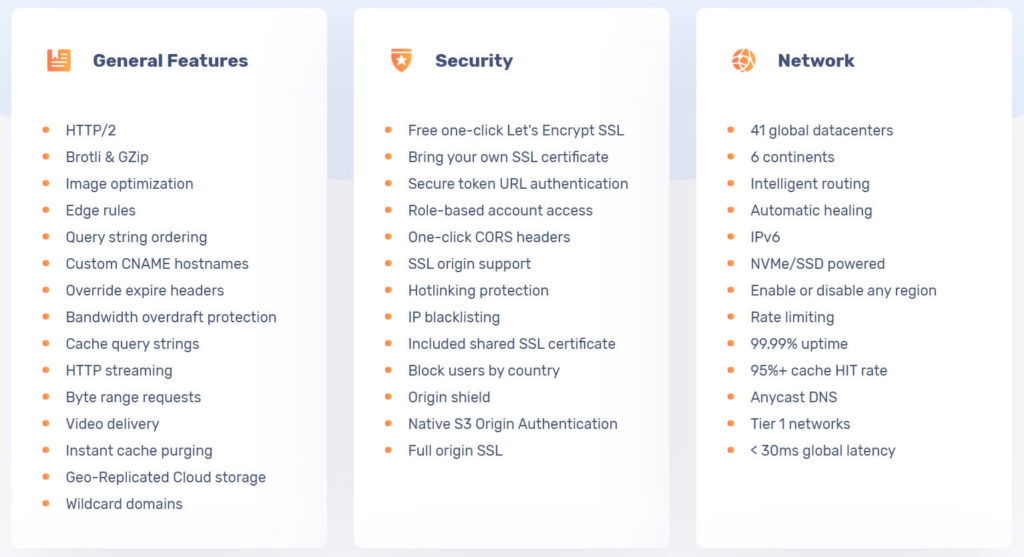
Features
- < 29ms global latency
- 99.99% uptime
- 98 global datacenters
- 80 Tbps+ Global Network
- HTTP/2
- Brotli & GZip
- Video delivery
- Cache query strings
- Query string ordering
- Image optimization
- Browser WebP support
- Browser AVIF Support
- Full origin SSL
- IP blacklisting
- Bandwidth overdraft protection
Some key benefits and solutions of BunnyCDN.
Website Acceleration: After implementing the Bunny CDN to your site, it helps to make your website faster globally. so, it helps increase the conversion rate and maximize your revenue.
With the help of Brotli, HTTP/2, global PoPs, SSDs, and BunnyCDN speed up your website and meet the user demand as well as improve the customer experience.
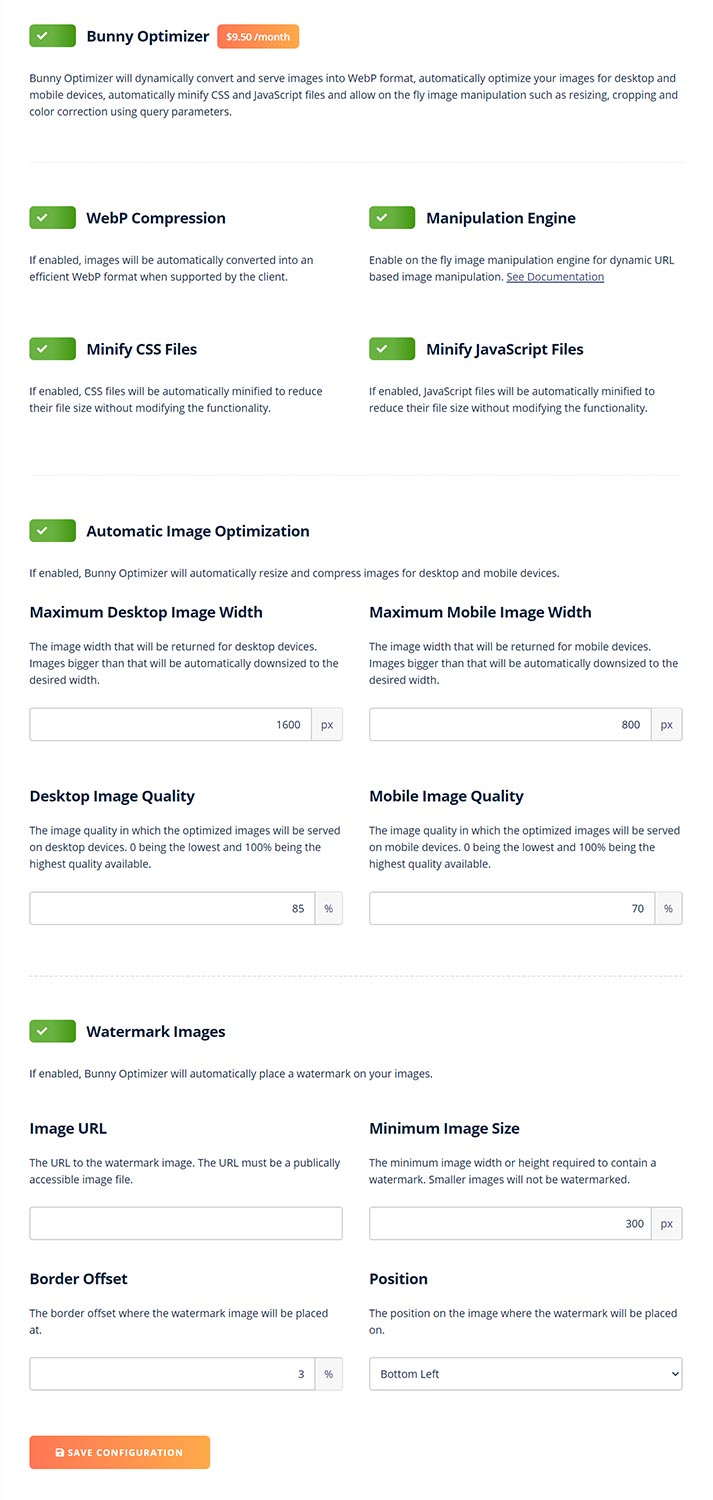
Bunny Optimizer: One of the important features of BunnyCDN is Bunny Optimizer. Bunny Optimizer helps to convert and server images to WebP format dynamically. It also helps in automatically resizing images for Desktop and Mobile devices.
Moreover, it automatically minifies CSS and JavaScript files. It also has features like resizing, cropping, and color correction using query parameters.
The above features make Bunny Optimizer the most important solution for images and files.
Bunny Optimizer is a completely optional feature. You can enable it by visiting your Pull Zones > Optimizer > Bunny Optimizer. The price for Bunny Optimizer is $9.50/month.
Replicated Cloud Storage: Replication Cloud Storage is a brilliant and unique solution offered by Bunny CDN. They have features called Perma-Cache also known as Permanent Cache that help to replicate your origin server files automatically to a global storage network and store your files permanently.
For Example: If your site is hosted in India and your visitor is from the US then with the help of Geo-Replicated Storage the CDN files load from the US rather than from India.
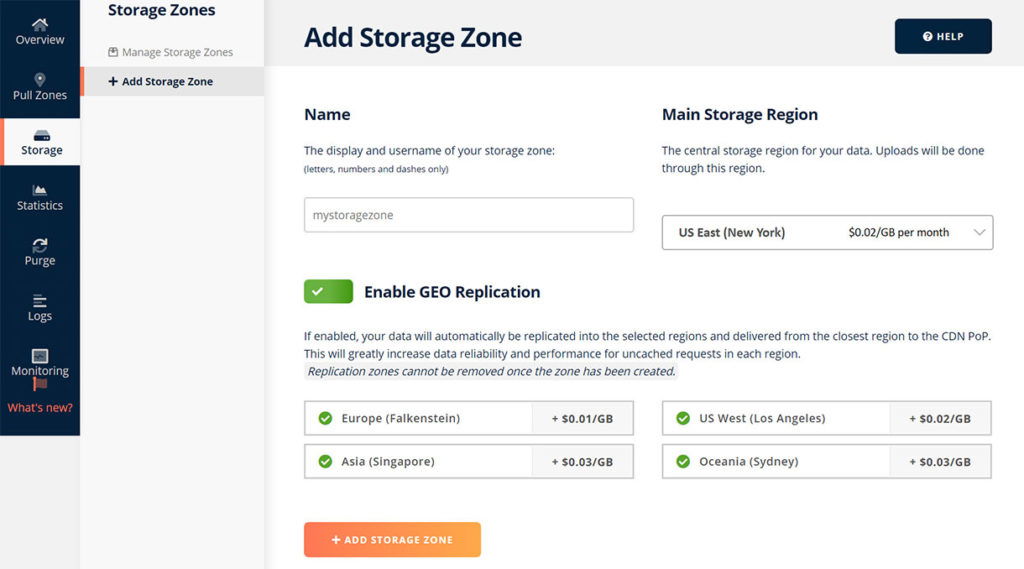
To enable Perma-Cache first you need to a storage zone, Go to Storage, Enable GEO Replication, and Add Storage Zone after that, Go to your Pull Zone and Enable Perma-Cache.
Video Delivery: Backed with a smart routing engine and NVMe-based hardware, Bunny CDN offers smooth playback for video delivery.
The global network, Media Optimized Caching, and Hotlinking Protection features bring video delivery to the next level in Bunny CDN. You can enjoy smooth video playback, no buffering on the videos, Fast Video Skipping, etc. with the help of Bunny CDN Video Delivery Solution.
How to Setup BunnyCDN in WordPress?
Setting up BunnyCDN in WordPress is straightforward. You simply need to sign up into BunnyCDN and create a pull zone and install the BunnyCDN plugin for WordPress.
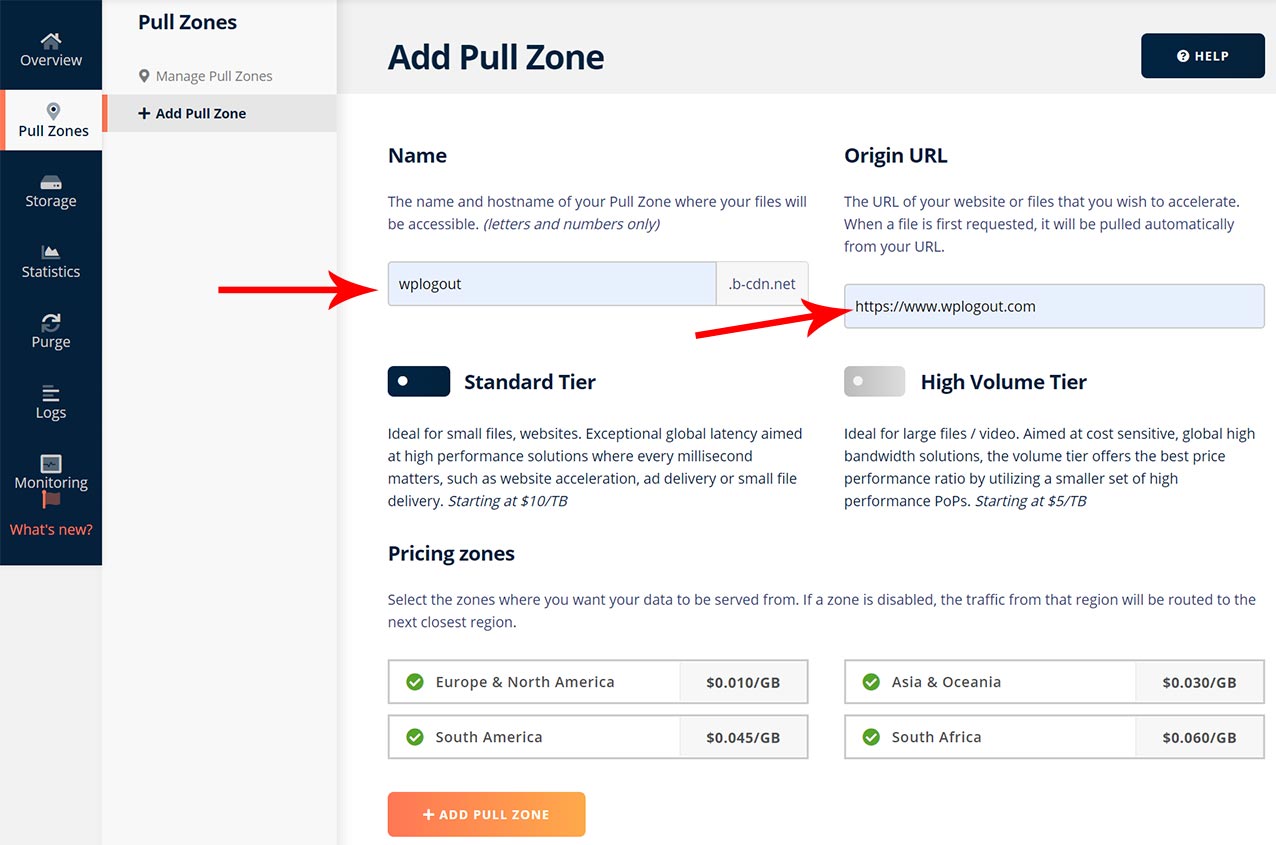
1. Create a Pull Zone in BunnyCDN
Go to the Pull Zones Menu and Click on Add Pull Zone.
Add Pull Zone name, usually, your website name, and Add Origin URL i.e. your website name.
Choosing Standard Tier is usually best for small websites. Select the CDN zones. I usually select all the zones.
2. Install BunnyCDN WordPress Plugin
Now, install the BunnyCDN Plugin from WordPress Repo.
- Go to Plugins > Add New >
- Search BunnyCDN.
- Install and Activate the plugin.
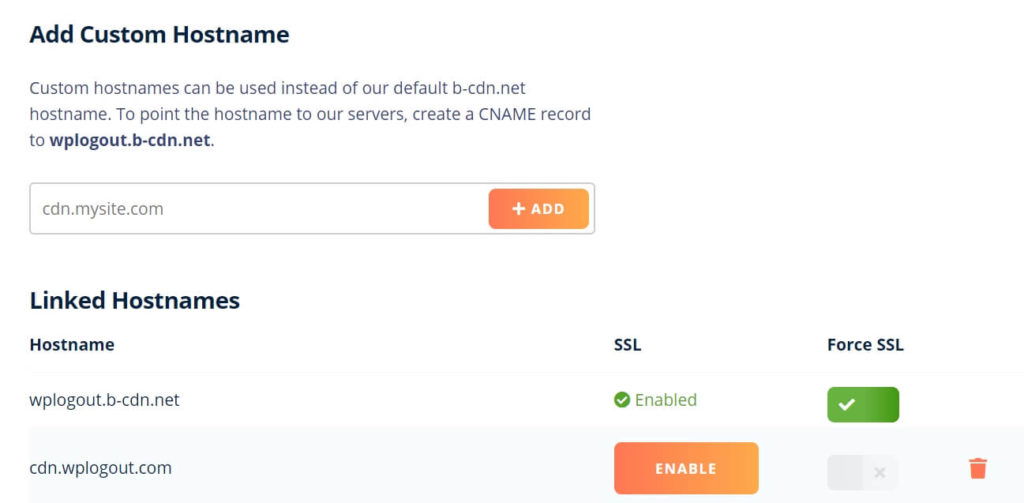
3. Add Custom Hostname
Now, you can add a hostname, you can skip it if you don’t want to use a Custom Hostname.
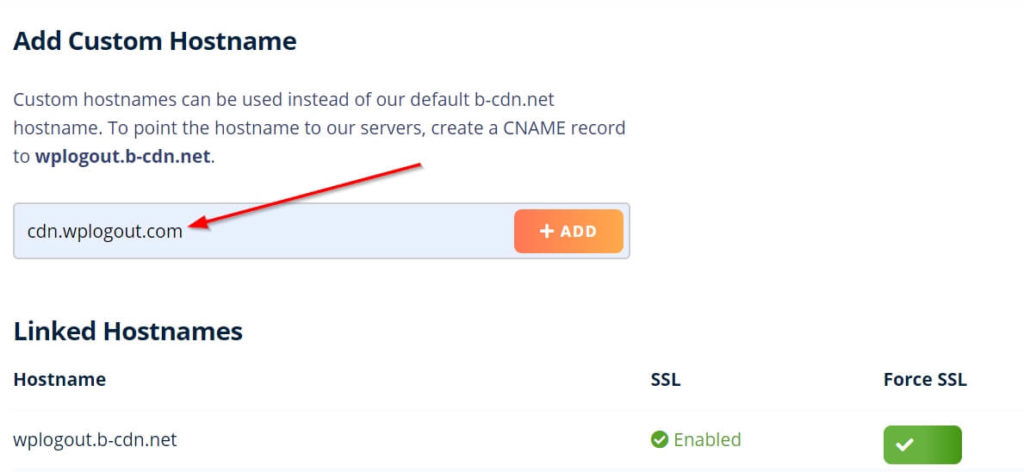
Enable SSL for your Host Name and Click on Get a free certification. You can also upload your own SSL Certificate and Enable force SSL. Before that, you need to point your b-cdn.net record using a CNAME record.
If you are using any hosting or Cloudflare then add CNAME. Here is the way to add CNAME in Cloudflare.
Go to your Cloudflare and locate your site and go to DNS and add the CNAME record. Here use Proxy status as DNS only.

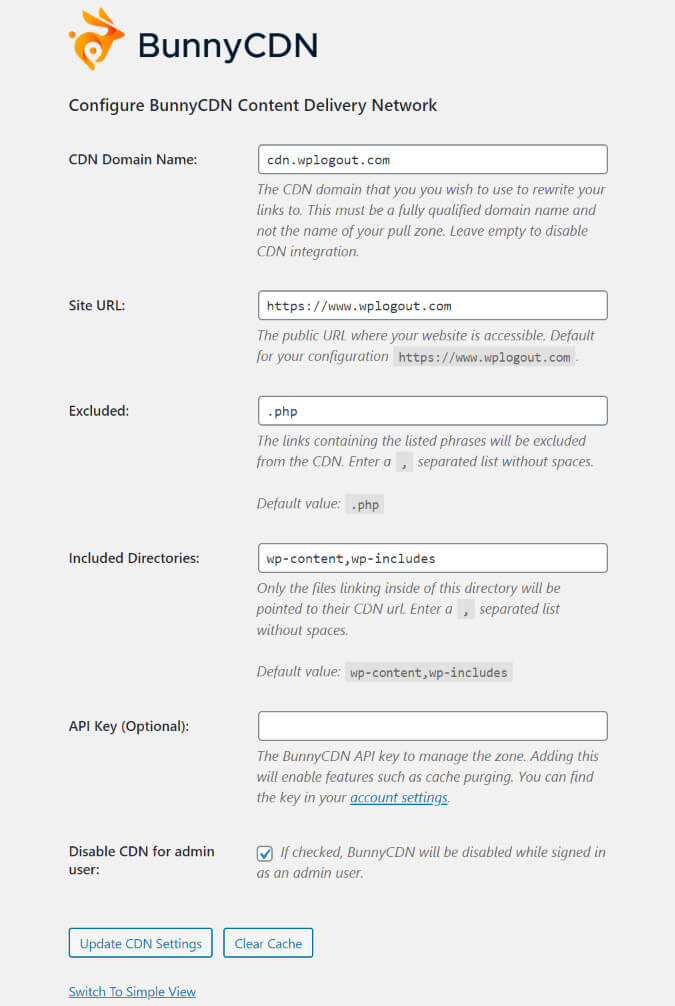
4. Configure the BunnyCDN Plugin in WordPress
Now, go to the BunnyCDN setting from your Dashboard. Click on Switch to Advanced View
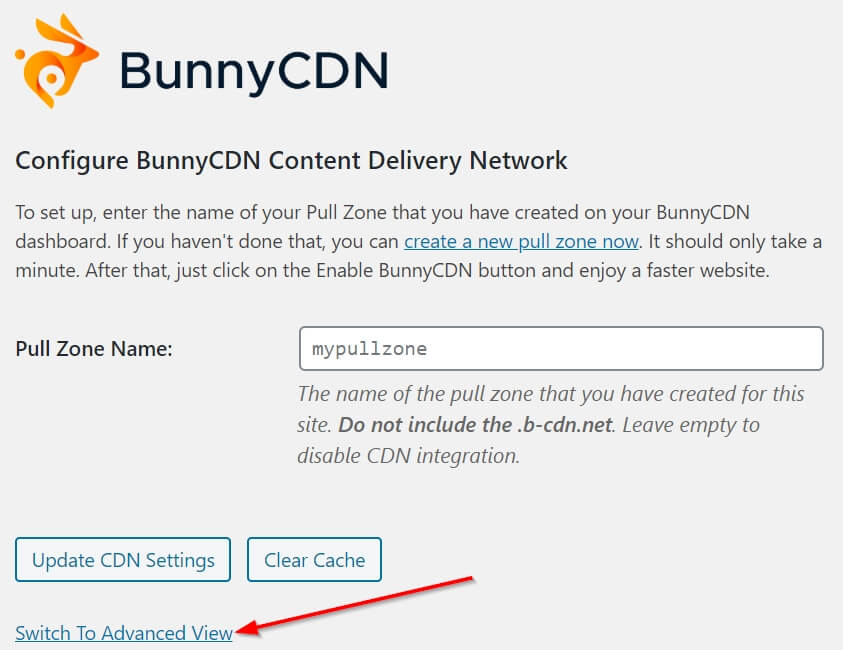
Enter your CDN Domain Name, and your site URL, and hit Update CDN Settings.
5. Bunny CDN Settings
Here are some settings you need to enable after configuring Bunny CDN.
Go to your pull zone to enable/disable settings.
Caching: Set Cache Expiration Time to Override: 3 months or 1 year and Browser Cache Expiration Time to Override: 3 months or 1 year. Turn on Disable Cookies. Also, Turn on Browser WebP Support in the Vary Cache setting.
Perma-Cache: Enable Permanent Cache with the help of a replicated storage zone to your origin server that automatically stores files across a global storage network.
Headers: Enable Add CORS Headers, and Add Canonical Headers in the headers setting.
Optimizer: Bunny Optimizer compress your JS and CSS files and dynamically server images into webp format.
Origin Shield: If enabled Origin Shield is, all the uncached requests will first be routed through a secondary caching layer.
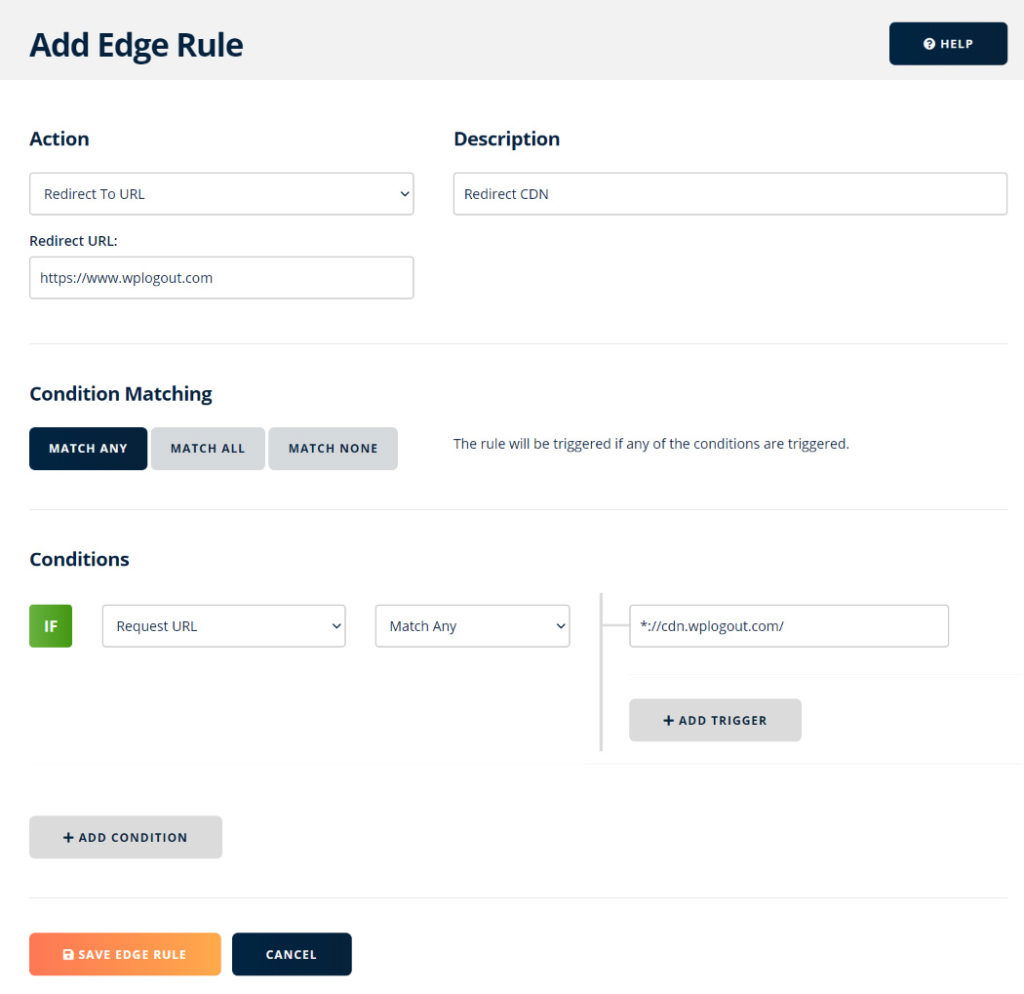
Edge Rules: Here you can allow edge rules to fine-tune your pull zones. For example, you can redirect your CDN URL to your origin URL.
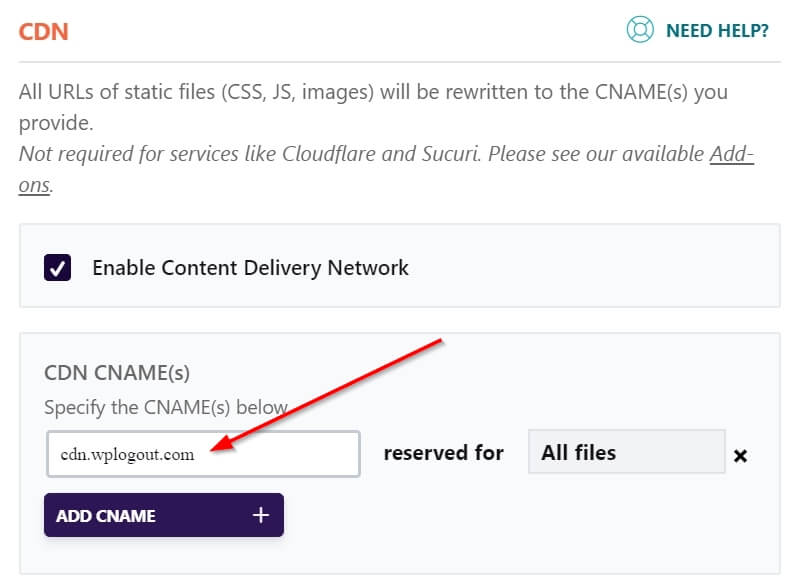
How to Configure BunnyCDN in WP Rocket?
If you are using WP Rocket or any other WordPress Caching plugin then you can follow a similar method to configure CDN.
Here, we are going to configure the BunnyCDN hostname in WP Rocket.
Go to Settings > WP Rocket > CDN Enter the CDN URL and Hit Save Changes.
Support
In BunnyCDN, you get full support from the team members via email only. There is no live chat for the support but you can get your answer quickly via email.
You will get basic support that is 24/7 and the response time is basically less than 24 hours.
Soon, BunnyCDN is coming up with a private Slack channel for more support options.
To get BunnyCDN support.
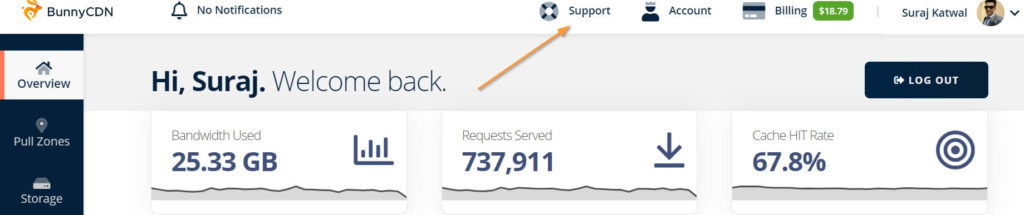
- Go to Bunny CDN Dashboard.
- Click on Support.
- Click on New Ticket.
- Now, Enter/Select your Subject, Pull Zone, Description, and Attachments.
- Submit your Ticket.
I got the response for my tickets within a few hours. You will get a reply for your tickets from Dejan Grofelnik Pelzel (Founder & CEO) and Harry (Support & Sysops).
Now, WP Rocket CDN is powered by Bunny CDN, one of the fastest CDNs in the world. The new partnership will allow WP Rocket to implement high-impact features, such as page cache, and improve the performance of websites worldwide.
Bunny Stream
Powered by Edge Storage, Bunny CDN has now started a Bunny Streaming service it helps to deliver online videos that are hassle-free and available with tight security and powerful storage.
It has some the top class features
- Free Encoding and no Securities fee.
- Pay as you Go
- Custom Watermark
- Free Video Player
- Simple API
- Built-in Monetization options with Simple API.
- Fully Customizable
Documentation
BunnyCDN is loaded with full of insightful documentation. You can find an exclusive knowledge base and blog on the official site including guides, FAQs, and community help, visit support.bunnycdn.com to get started with BunnyCDN.
You can browse articles related to Getting Started, Troubleshooting, Integration, and other Technical Information.
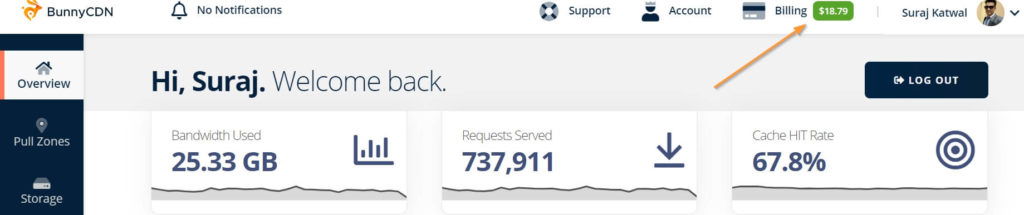
BunnyCDN Speed Test
We usually look after TTFB (Time To First Byte) while testing the site. I am testing BunnyCDN’s performance. Here I tested the CDN route for my site and the result for CDN Testing is impressive.
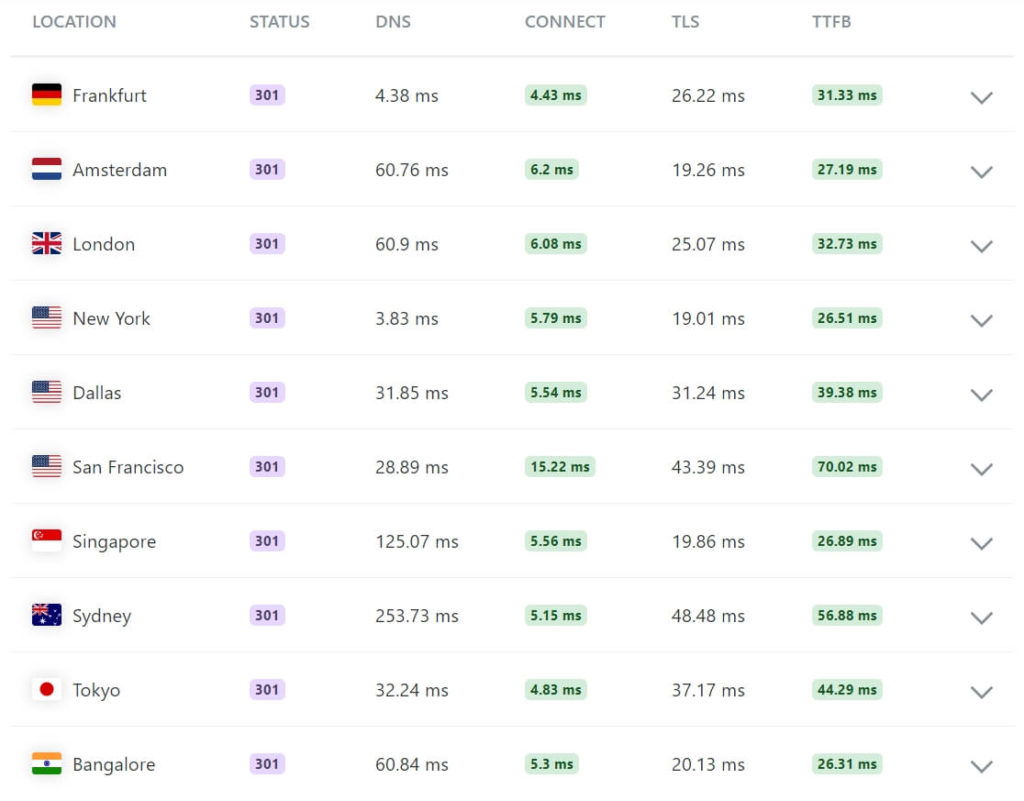
If your site’s TTFB is under 100 ms then you are standing in a solid state. It is recommended to have TTFB under 200 ms.
The good TTFB for a website is between 200 ms – 500 ms. If your TTFB is greater than 500 ms then you need to contact or upgrade your hosting.
I am using Cloudways Hosting for my blog. It’s a pretty solid platform for hosting. If you are a speed enthusiast, you need a better stack for your site. You can read the Cloudways Hosting Review here.
Pricing
There are two pay-as-you-go BunnyCDN Pricing for unlimited sites. One is the Standard Tier model and another is the High Volume Tier Model.
Standard Tier: It is ideal for small websites and files with 98+ PoPs globally. I use Standard Tier on my blog.
High Volume Tier: It is ideal if you are hosting large files/videos. High Volume Tier helps to save the bandwidth with the best price-performance with 8+ PoPs globally.
Note: You need to pay a minimum $1/month for the usage. It means if your billing is less than $1 then it will charge you monthly $1. You can add unlimited Pull zones in on account.
1. Standard Tier Pricing
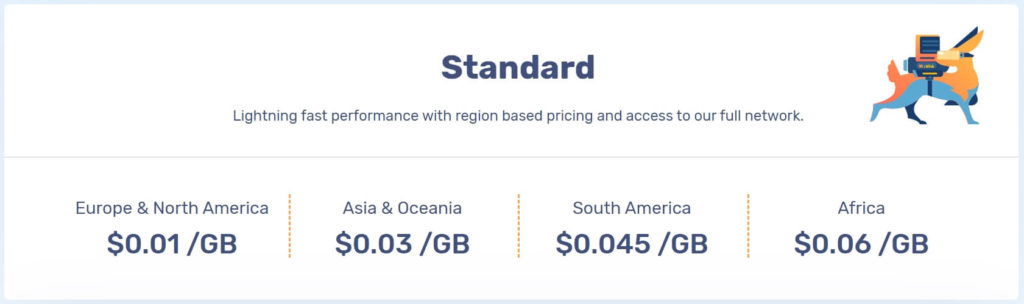
| Region | Pricing |
|---|---|
| Europe & North America | $0.01 /GB |
| Asia & Oceania | $0.03 /GB |
| South America | $0.045 /GB |
| Africa | $0.06 /GB |
2. High Volume Tier Pricing
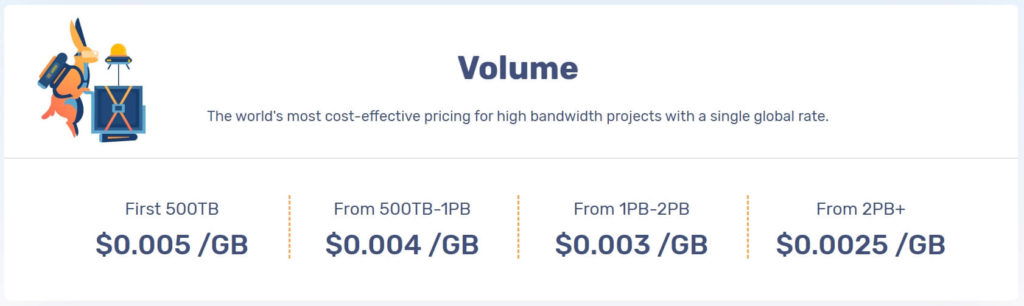
| Volume | Pricing |
|---|---|
| First 500TB | $0.005 /GB |
| From 500TB-1PB | $0.004 /GB |
| From 1PB-2PB | $0.002 /GB |
| From 2PB+ | $0.0025 /GB |
BunnyCDN Promo Code
If you are looking for a BunnyCDN Coupon code or discount then you can only use the coupon code after signing up to BunnyCDN. If you aren’t a user yet then sign up using the below link.
The BunnyCDN Promo code is valid for both new users and existing users (at the time of writing this tutorial).
- Go to BunnyCDN.
- Login to your Account.
- You will be redirected to the Dashboard.
- Click on the Billing Menu.
- Click on Enter Promo Code.
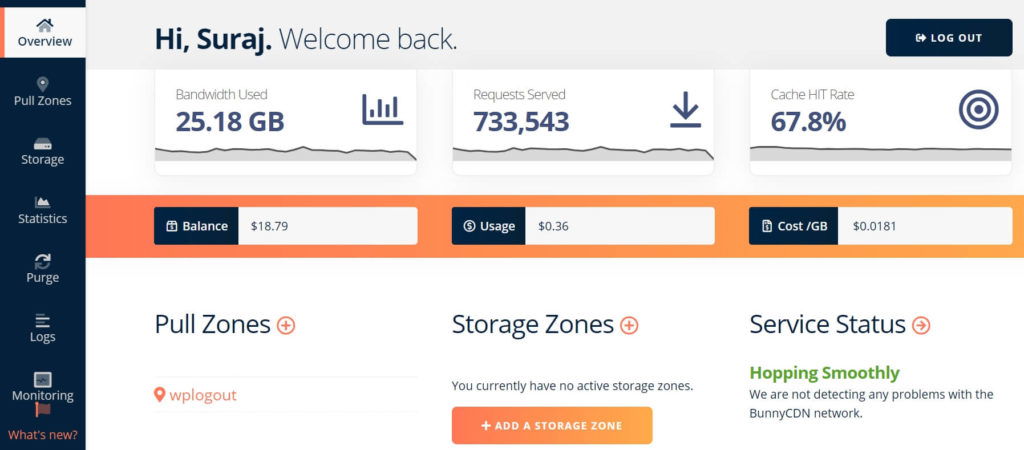
- Use WPLOGOUT BunnyCDN Promo Code to get a $5 Valid Balance.
- Click on Apply Code.
- Done.

Competitors
Here are many CDN providers that you can integrate with your website. Cloudflare, KeyCDN, etc are the main competitors of Bunny CDN and most of us are familiar with these providers too.
Cloudflare: You can integrate Cloudflare for free and I am using free Cloudflare for DNS purposes only. Other than the free plan they have Pro ($20/month), Business ($200/month), and Enterprise plans (Custom pricing).
KeyCDN: Key CDN is another competitor that has over 40+ data centers available with HTTP/2, Brotli, and TLS 1.3, features. Here the pricing model of KeyCDN is a bit expensive compared to BunnyCDN.
| Region | First 10 TB | Next 40 TB | Next 100 TB | Over 150 TB |
|---|---|---|---|---|
| North America & Europe | $0.04/GB | $0.03/GB | $0.02/GB | $0.01/GB |
| Asia & Oceania | $0.08/GB | $0.06/GB | $0.04/GB | $0.02/GB |
| South Africa & South America | $0.10/GB | $0.08/GB | $0.06/GB | $0.04/GB |
Bunny Fonts
Now, you can enjoy Bunny Fonts alternative to Google Fonts. As you know Google Fonts are not GDPR-friendly so here come the fonts by Bunny CDN Team.
It is an open-source font that is GDPR compliant and faster than Google Fonts keeping privacy first. It doesn’t track its users as it can be used commercially and is compatible with Google Fonts.
Frequently Asked Questions
Is it safe to use BunnyCDN?
Yes, BunnyCDN is totally safe to use on your website. It is a performance-based company that provides an innovative, secure, and lightning-fast content delivery solution.
How to use BunnyCDN Promo Code?
Go to the BunnyCDN billing section and Enter WPLOGOUT as a promo code and get $5 credits.
How to use BunnyCDN on a WordPress website?
You can easily integrate BunnyCDN into the WordPress website by installing the official BunnyCDN WP Plugin and configuring the CDN settings in WordPress.
How much does BunnyCDN charge monthly?
The minimum BunnyCDN price is $1/month for active pull zones. If your monthly usage is below $1 then it will be rounded up to $1+ per month depending upon how you use different services of BunnyCDN like Stream, Storage, Optimizer, etc.
Does BunnyCDN support multiple pull zones?
Yes, you can add multiple pull zones in one account. You have to manage each pull zone individually.
Verdict
After using Bunny CDN as a proxy for my blog, I have concluded that it is one of the best CDN options out there. According to cdnperf.com, it is ranked as one of the top CDN providers in the world. The integration with Cloudflare DNS has been seamless, ensuring a smooth and efficient delivery of my blog’s content.
The use of the Bunny Optimizer to serve webp images within the browser is a great feature, but it is a bit pricey. However, if you opt not to use the Bunny Optimizer, the CDN service becomes much cheaper. Overall, I highly recommend Bunny CDN for any blog or website looking for a fast, reliable, and cost-effective CDN solution.
BunnyCDN Review Conclusion
If you want to speed up your website then choosing the right stack is a crucial part. Besides that, the CDN plays an essential role in making your website faster globally.
Moreover, if you are a speed enthusiast then you should consider implementing CDN on your website. I hope by reading BunnyCDN Review, you can set it up on your WordPress websites.
so, why don’t you try BunnyCDN on your website? They offer a 14-day free trial without any credit card required. so, feel free to test the fastest and most affordable CDN.
Personally, I am using BunnyCDN for this site and other various sites by creating different pull zones under one account. I am personally super happy with the pricing, customer support, and eagerness to solve our queries.
If you have any questions related to BunnyCDN then please feel free to comment below.
plzz make post on pagnination of generatepress customization like you.
Sure, I will soon publish a post on Pagination.
Thanks
Nice post as always bro. I just bought BunnyCDN and configured.
Hi Vijay,
BunnyCDN is worth buying and you won’t regret it.
Cheers
Hi bro, i have configured bunnycdn on my website but i have a question.
I am using wp rocket and cloudflare, i have added my cdn to wp rocket cdn settings and everthing went well and i can see cdn urls in image sources. should i install BunnyCDN Plugin too? to use it.
and one more is using i am using cloudflare cdn and bunny cdn both what should i do? change settings or leave as it is.
Hi Arsh, If you are using BunnyCDN URL in WP Rocket settings then, you can avoid the uses of the BunnyCDN plugin since both are doing the same work. Also, you can use Cloudflare for DNS purposes only and BunnyCDN for CDN. Always use DNS Only at Proxy Status in Cloudflare for your domain URL and CDN URL.
Thanks
hey i want to switch to bunny cdn.
can u tell me a website having 1mill monthly page view how much gb is required? i m asking this for pricing purpose
Hi Saagar,
You can chat with the Bunny Support team for a clear answer.
Thanks
After implementing Bunny CDN, my website is not opening properly (too many 502 errors) – Images are missing and CSS is broken. I am also using Cloudways hosting. When I asked their support they told me it is your Hosting issue. However, Cloudways support is telling me that everything is fine at their end. Have you ever faced this issue? Do you know how can I solve this?
Hi Pintu,
Sorry that you are facing some problems.
Have you checked by disabling Bunny CDN?
Have you checked your site by disabling all the plugins?
Please check step by step and ask your hosting to assist with the 502 problem.
Thanks
Thanks, Suraj for replying. I did disable the Bunny CDN and everything works fine. This problem occurs whenever I enable the CDN.
Can you share what are the ”Cache Expiration Time” settings you’re using on both Bunny CDN and WP Rocket.
Mine is 1 year in Bunny and 24 Hours in Wp Rocket.
Thanks.
It’s the same setting as yours.
Can you share your website URL in my mail?
Thanks
How to get 100% page speed like your website on mobile?
How to use BunnyCDN properly? I have used BunnyCDN but my website’s speed has decreased and style is broken.
looking forwards to your answer.
Hi Sandeep,
1. Follow the steps to configure BunnyCDN from this page.
2. Ask the BunnyCDN support to check your site, whether it is properly configured.
3. Also, check your caching plugin (if you have used it).
4. Lastly ask your hosting provider too.
Thanks
Is it necessary to use caching plugin if using CDN already?
Hi Abby,
The answer is YES.
How do you connect your WordPress website to the Bunny CDN Storage Perma Cache without problems?
Like needing to purge the cache every time that you need to login, pages will be cached with the adming bar at the top, which means that all users will see it, comments will not update, the post previews will not update, …
Thanks.