Creating a multilingual WordPress website means translating your blog/website into multiple languages. Generally, a multilingual WordPress website is created when you have the audience from different countries speaking multiple languages.
Some of the developers usually create sub-directories to manage multiple language websites which is time-consuming & it basically is hard to manage.
Building a multilingual WordPress website is an easy task if you are familiar with WordPress’s multi-language plugin. There are various WordPress multilingual plugins from free to paid that can help us to create a multi-language site with ease. Some of them are
- WPML
- Polylang
- Weglot
- TranslatePress
From an SEO perspective, it is best to manage your website using a plugin rather than creating sub-directories. Polylang WordPress Plugin is the best plugin to do so. You can quickly build a website with various languages.
In this article, I’ll help you to create a Multilingual WordPress Website using Polylang Plugin for free. There are lots of advantages you can take while having a multilingual website.
Why Polylang for Multilingual WordPress Website?

There are free to paid plugins like WPML, Weglot, TranslatePress, etc that too help us in creating a multilingual WordPress website.
Polylang is a freemium plugin where we can get started for free. Polylang is one of the best multilingual plugins in the market and furthermore, if you are a beginner & not willing to pay for premium plugins use it. Polylang is
- Simple, Free and Open-Source Multilingual Plugin.
- Light-Weight Plugin.
- Easy and User-Friendly to Use.
- Can create separate articles for translated posts.
Features of Polylang Plugin
- You can choose as many languages as you want after installing the Polylang plugin.
- Right-to-Left(RTL) is supported by this plugin.
- You can translate posts, pages, categories, tags, custom post types, etc.
- It will create a default Polylang Language Switcher Widget which can be used in a sidebar to switch the languages.
- With Many More Features …..
Check Out: How to Start a Blog
How to Create a Multilingual WordPress Website using Polylang?
Almost every multilingual plugin has similar functionality i.e to translate everything from posts, pages, categories, tags, custom post types, etc. so the same does the Polylang Plugin do.
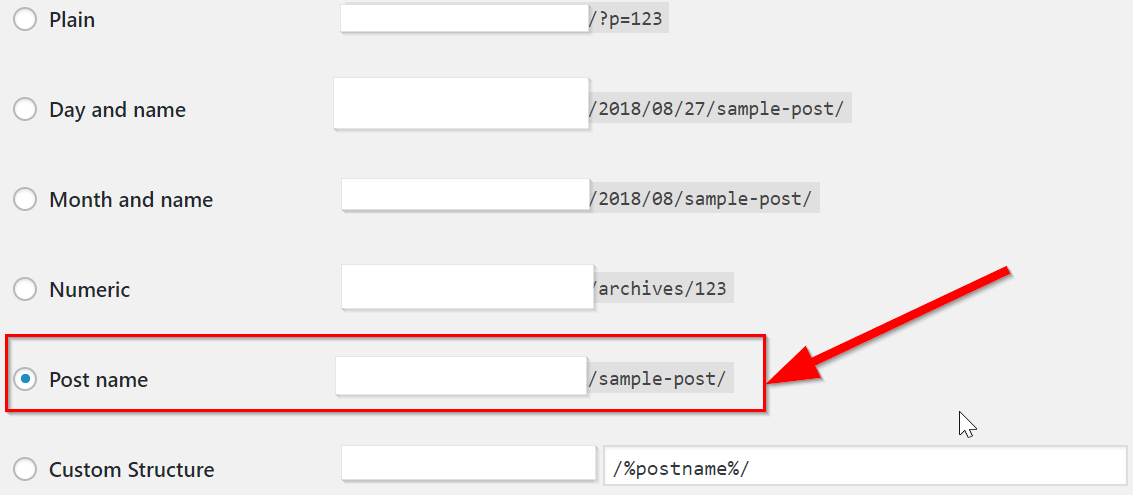
Before starting don’t forget to change your Permalinks.
Settings > Permalinks > Post Name
Let’s get started.
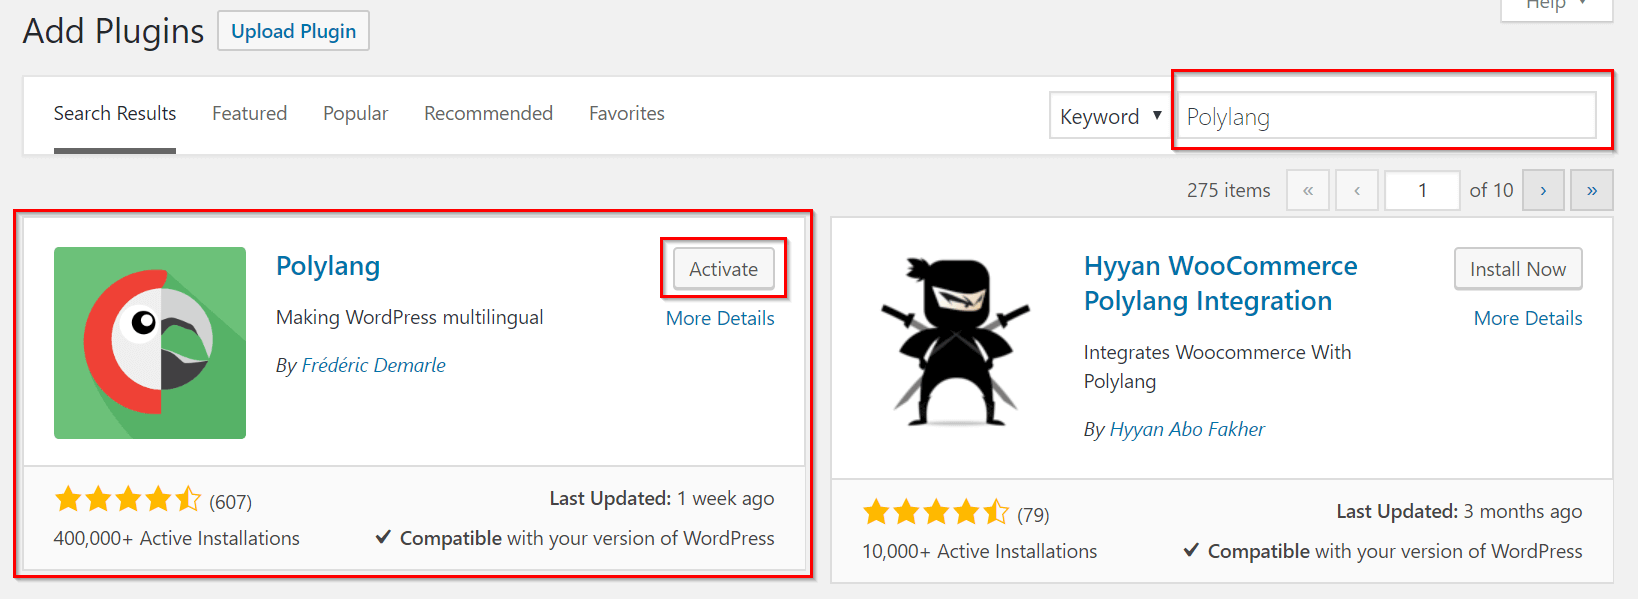
Step 1: Installing the Polylang Plugin
The first step of this multilingual WordPress website tutorial is to install Polylang Plugin from the official WordPress website.
Before installing you need to make sure you are using at least 4.4 or later WordPress version with an additional requirement of PHP with 5.2.4 or later running in your server.
On another note, you need to deactivate any other Multilingual Plugin to avoid conflict between them.
Plugins > Add New > Search Polylang > Install > Activate
Step 2: Polylang Languages Settings
After installing a plugin, you’ll see Languages settings in the dashboard located on the left sidebar similar to the image below.
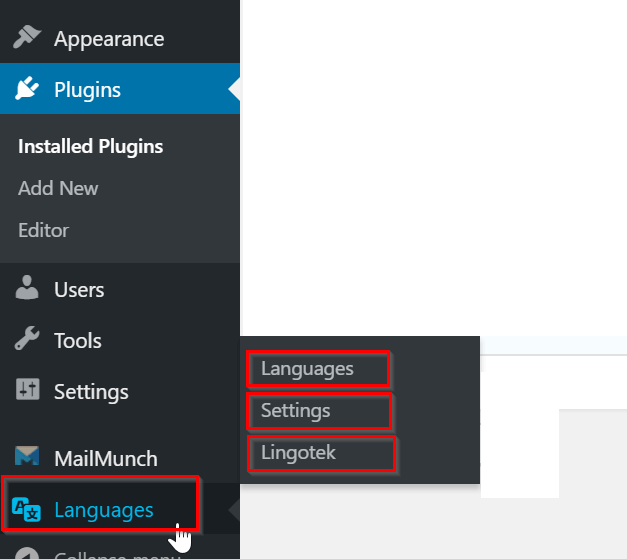
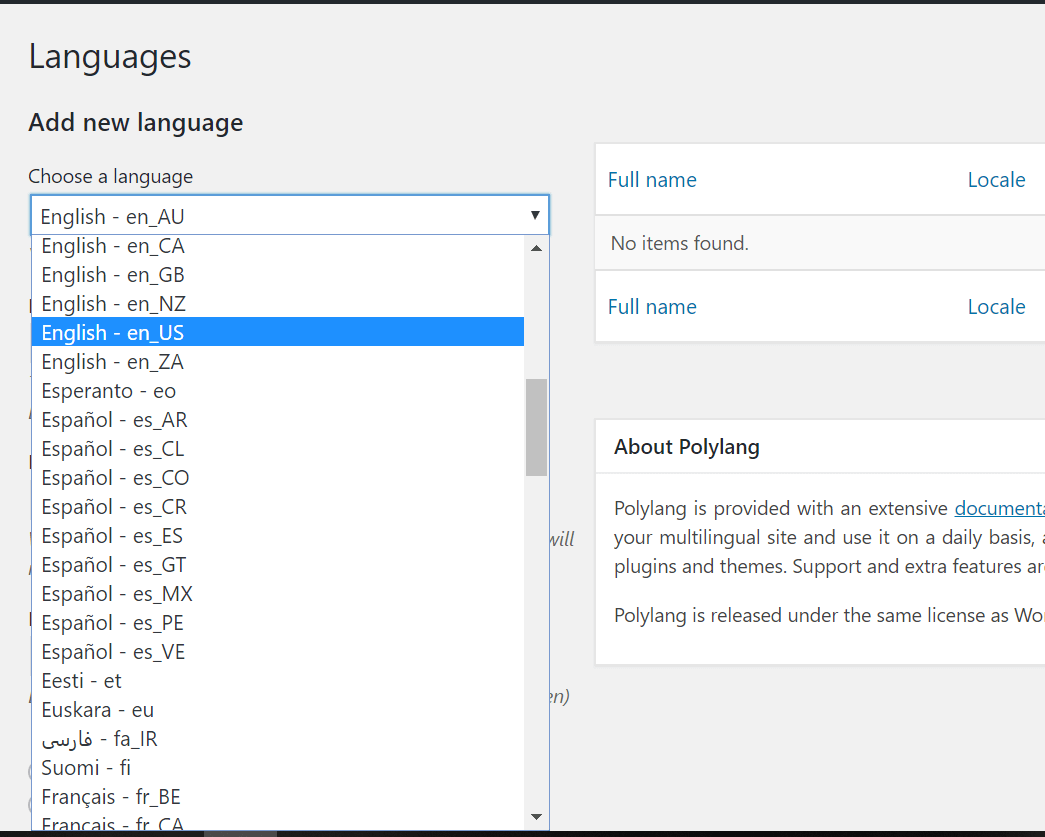
- Go to Languages > Languages to add the languages
- Choose the desired languages to translate your site into.
- The drop-down menu helps you to choose the languages.
After selecting the languages you will see the warning message saying
There are posts, pages, categories or tags without language. You can set them all to the default language.

Click on you can set them all to the default language.
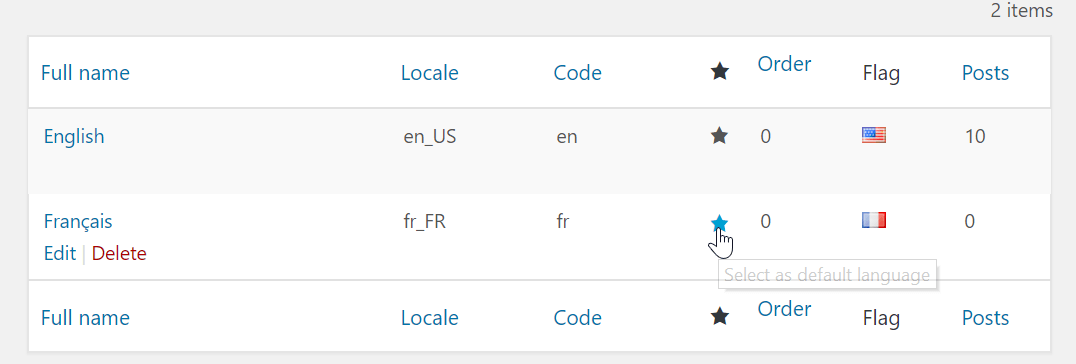
In this tutorial, I have chosen two languages one is English and the other is the French. Use Star sign to select the default language. Here English is my default language.
You can choose as many languages as you want according to your website needs.
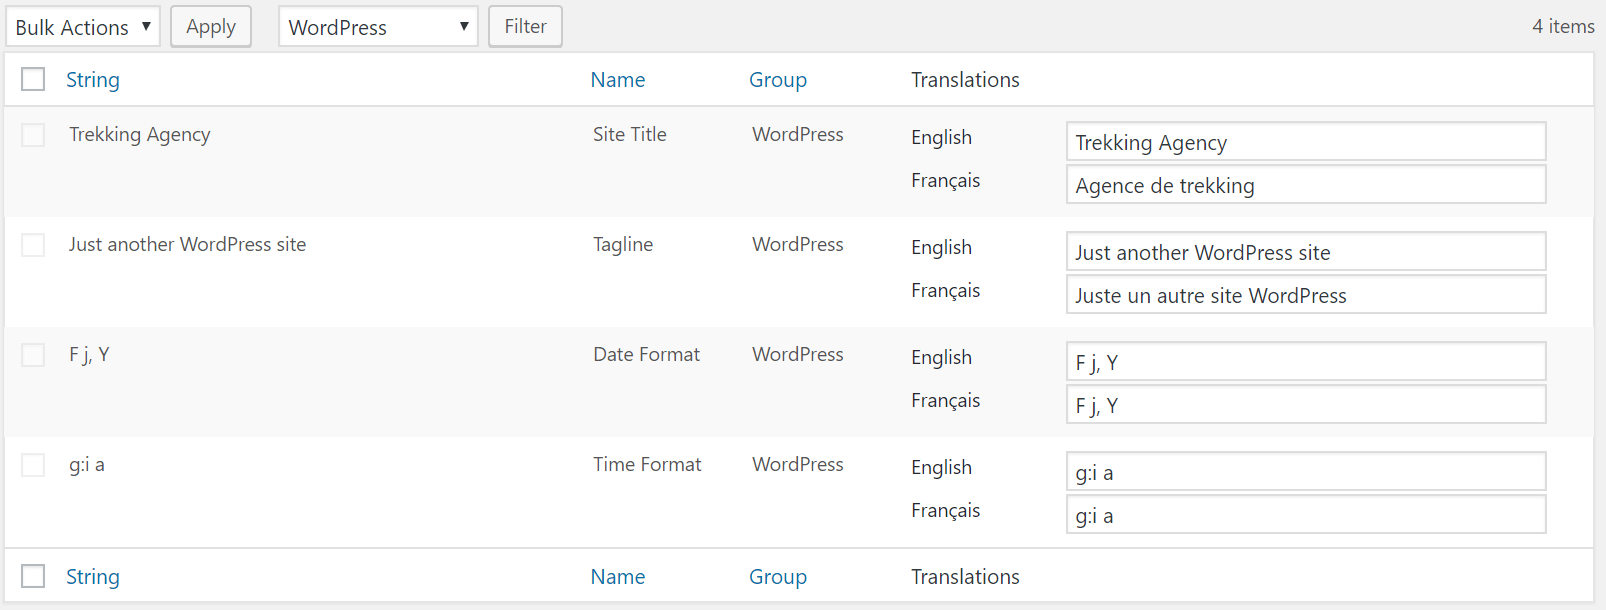
Step 3: String Translations
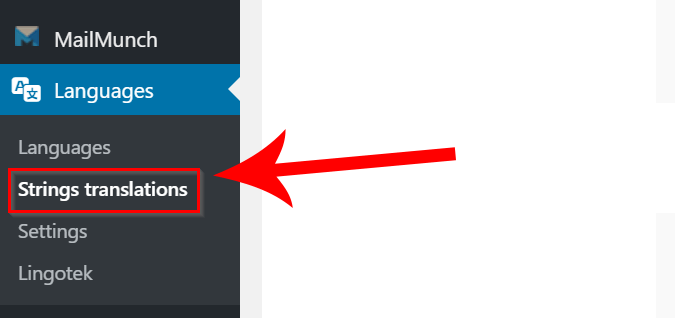
Next Step is to click on String translations available on the left menu bar in the dashboard section. You will see the setting like this
Note: Your theme needs to be Polylang Plugin compatible.
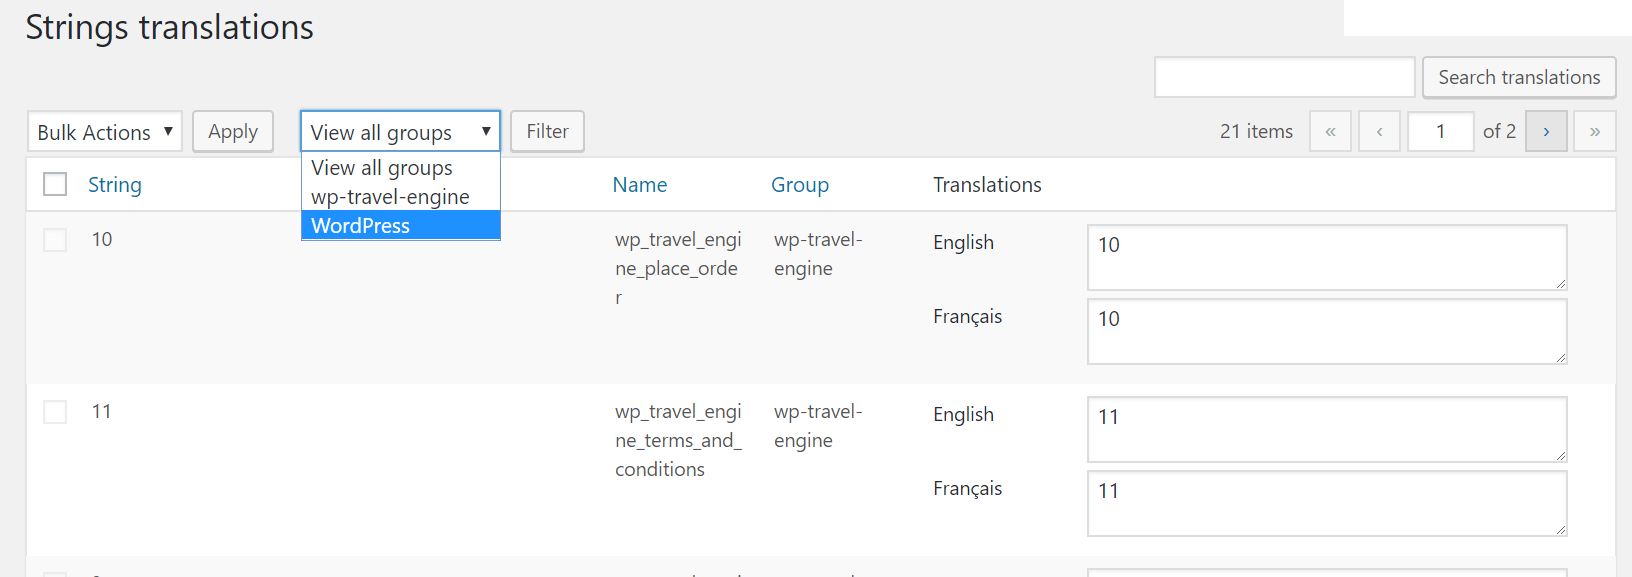
You will see View all groups option as in the picture. Now you can translate everything just starting from default WordPress basic settings. Choose WordPress > Filter.
Translate everything which is needed for other languages.
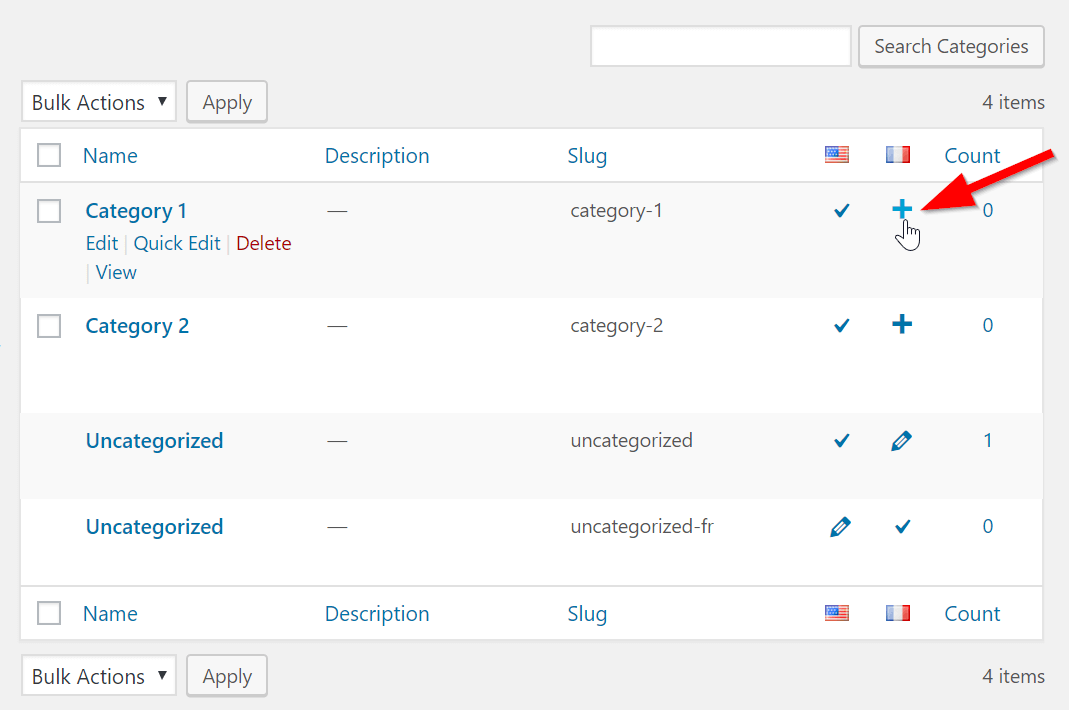
Now Go to Posts > Categories > Click on + sign to translate categories. Similarly, for tags too. Check the demo translation.
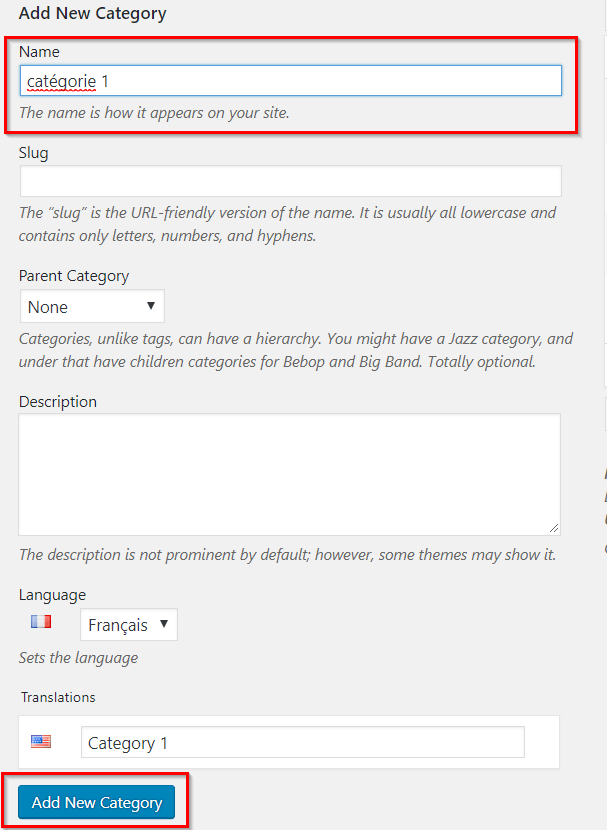
After clicking the + sign, a new category box will appear where you need to write categories name in another language. After that, Click on Add Category.
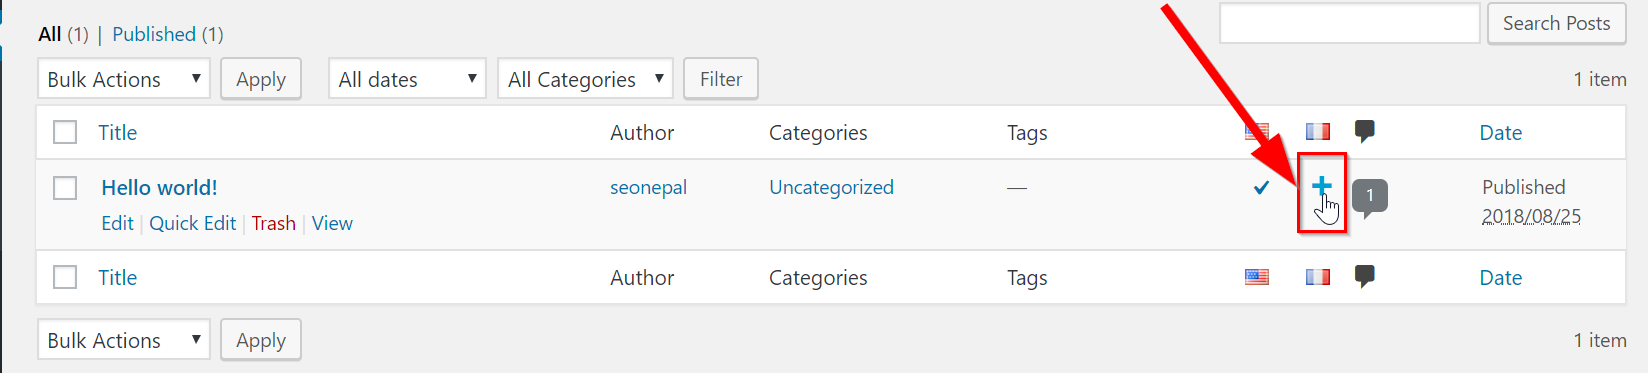
Furthermore, you can now translate your posts, pages, etc. Let’s have a look at posts. Go to Posts > All Posts > Select the post you want to translate
Click on “+” sign as shown in the picture
Translating Demo Post to the French Language. I am using Bing Translator for this example.
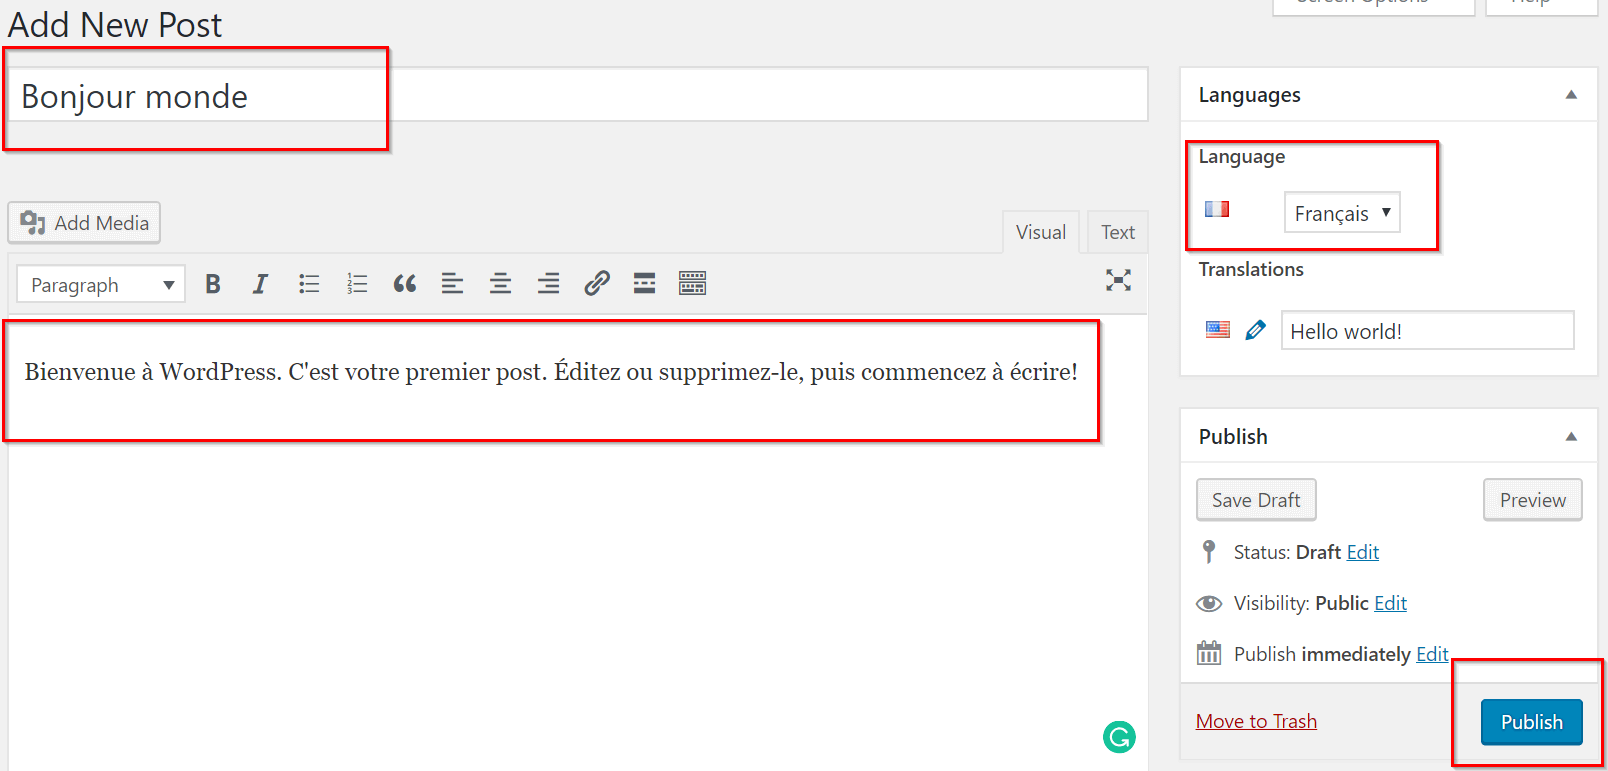
Use the same process for pages. Go to Pages > All Pages &Tranaslate
Also Visit: Best Blogging Resources and Tools
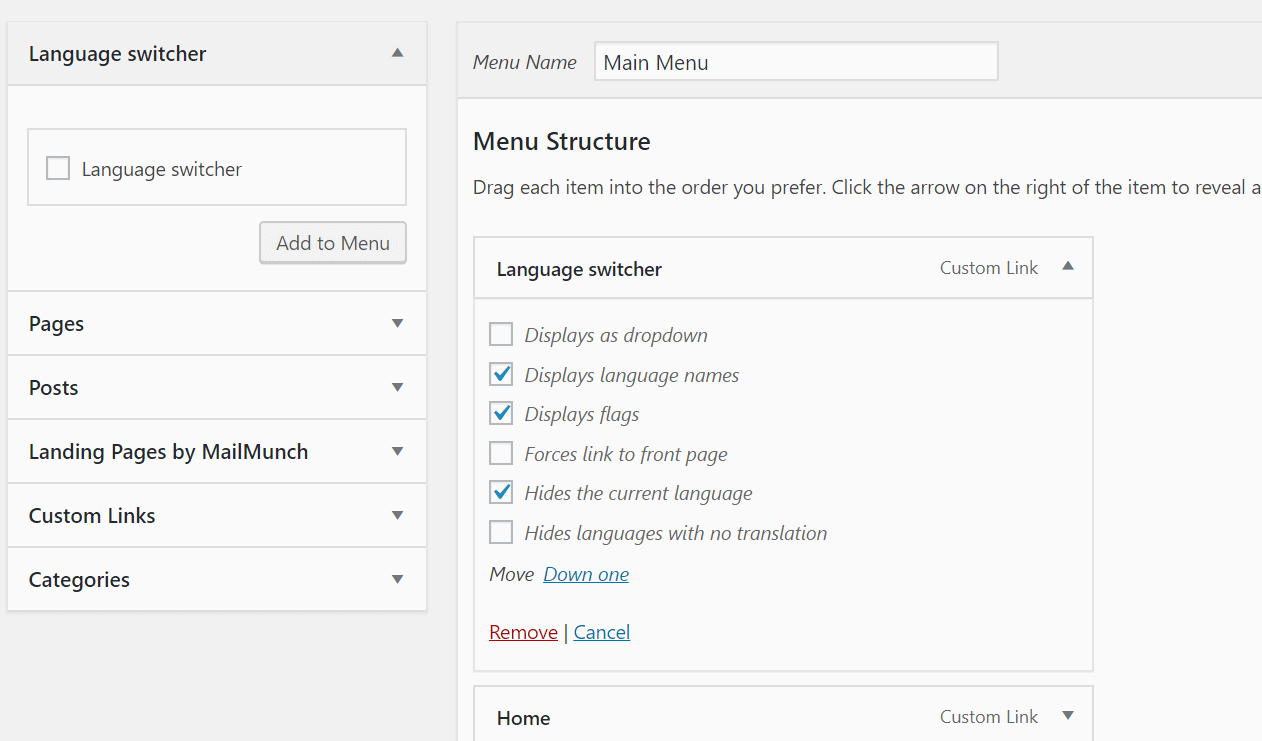
Step 4: Adding the Language Selector
Now you can add flags to your Menu & in the sidebar using the widget.
This is by far one of the best options for visitors who want to quickly switch between the languages.
Let’s add a switcher to Menu. Go to Appearance > Menus > Add Language Switcher.
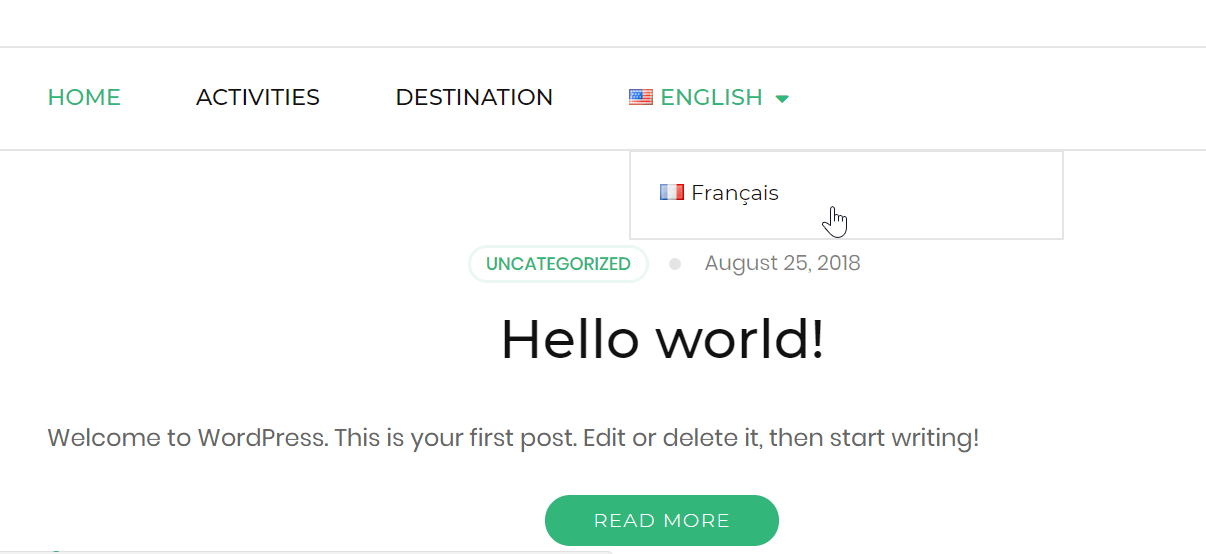
Now Polylang Language Switcher will be visible on the front end of your website. Let’s check it on the front side of the website.
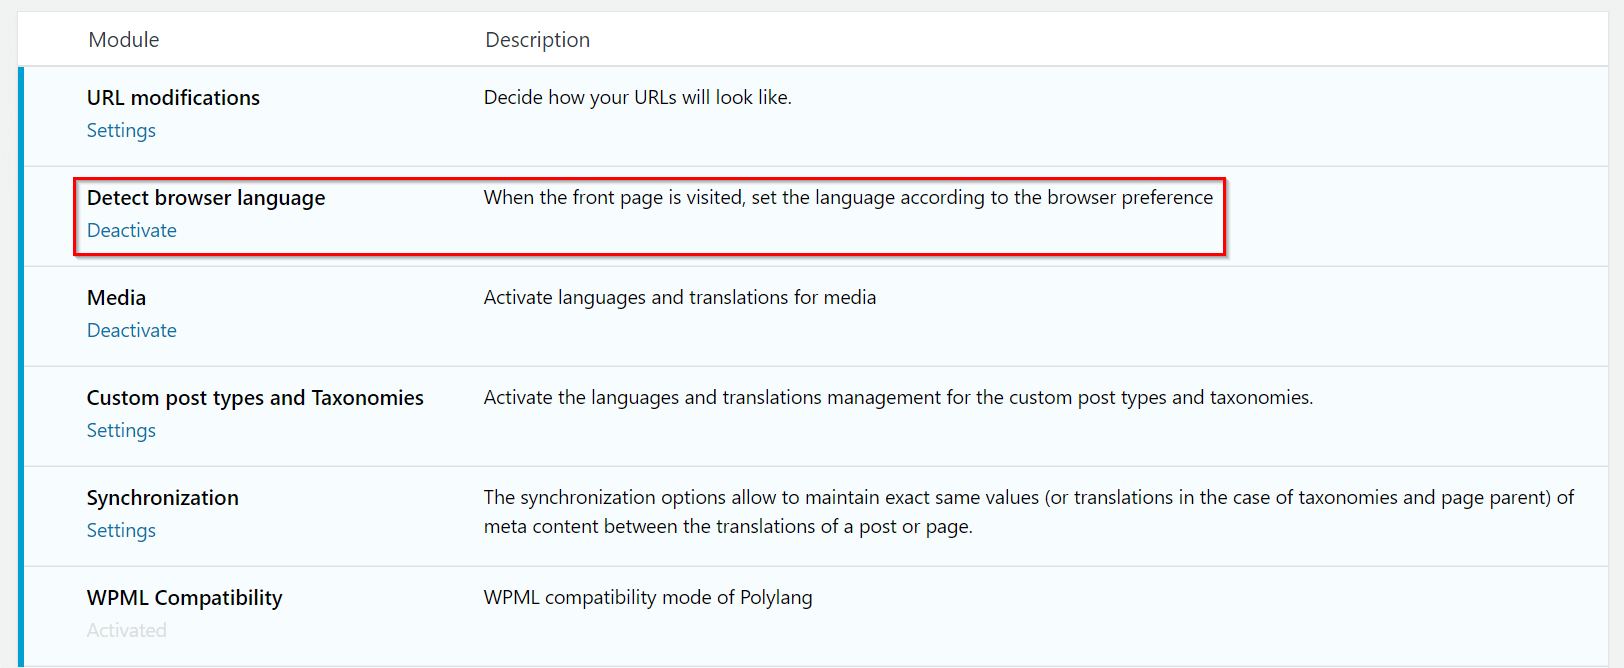
Last but not the least Go to Polylang Settings and Enable Detect Browser Language. This helps to automatically detect the visitor’s browser language and redirect them to an appropriate language’s website.
Conclusion
We used a Polylang Plugin which is the best WordPress translation plugin to create a multilingual WordPress website with few clicks.
On the other note, there is a Polylang Pro plugin available with additional add-ons like WPML Compatibility, Share slugs, Translate slugs, etc. with premium support.
If you got any problem while creating a Multilingual WordPress website, Please feel free to comment or contact me.
Keep on working, great job!
Thanks!!!
Disadvantages: The implementation is much more laborious. You have to keep multiple WordPress installations (perhaps on multiple servers) and have to go about connecting the posts and pages one at a time (with the above methods, the plugins are responsible for automatically connecting all translations as you go along).
Yes, you need to work for the languages you want to display on the website which can be time-consuming.
Nice post. What about href-lang implementation. Does it do automatically or do we need to add manually? Also will this translated content rank in search engines.