Learn how to Create a Subscription Box in Generateblocks without plugin. With the rise of Gutenberg Editor (Block Editor), you can do many more things than Classic Editor. Here you can accomplish even more with the latest Generateblocks plugin.
If you are not familiar with Generateblocks then it is a lightweight WordPress block that can almost accomplish everything. It is developed by Tom Usborne, the same developer behind GeneratePress Theme.
Generateblocks and GeneratePress, the combination of both the plugin and theme work great, and I am sure you are going to love it.
Steps to Create Subscription Box in Generateblocks without plugin
If you are using the GeneratePress theme then I have already a tutorial to add subscriber box in GeneratePress theme without a plugin. This is a similar tutorial and here we are going to use MailChimp Embedded forms.
1. MailChimp Embedded Form Code
Here we are using MailChimp Embedded forms so let’s generate the code.
1.) Go to MailChimp and login/signup your account.
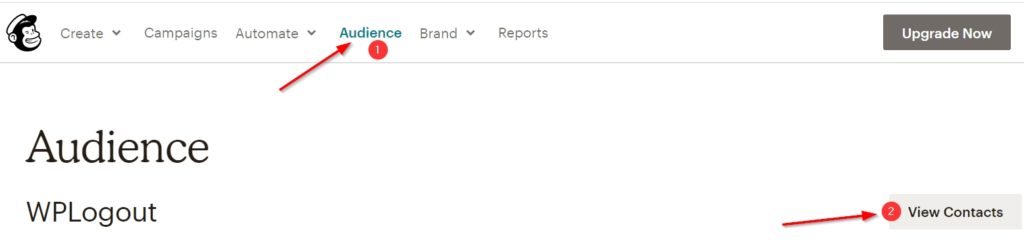
2.) Go to Audience > Click on View Contacts
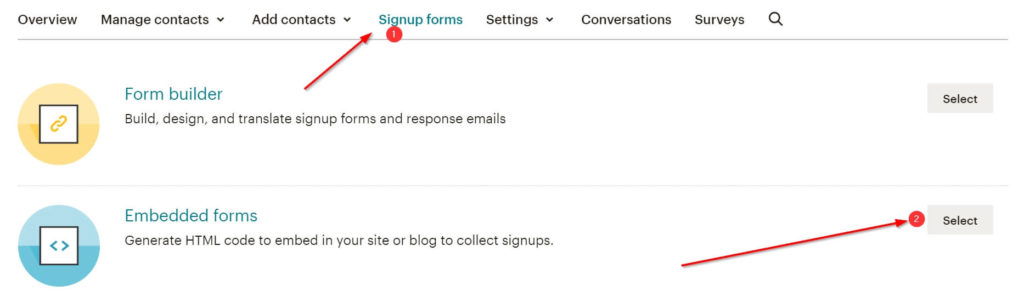
3.) Now Go to Signup Forms and Select Embedded Forms.
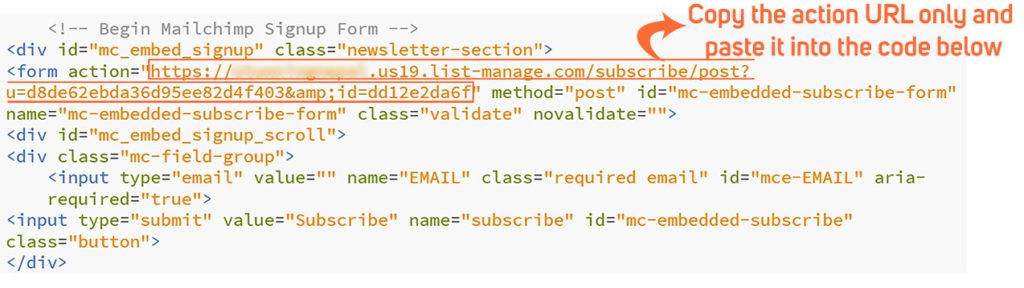
Now you can see the code generated by Mailchimp. You don’t have to copy the whole code. You will get the code down below.
Here, you just need to copy the action URL generated by MailChimp and Paste below in the code.
Also Read: GeneratePress Review
2. Adding Subscription Box in Generateblocks
Before getting started, you need to install Generateblocks, Go to Plugins > Add New > Search Generateblocks > Install and Activate the plugin.
After that go to your post or page where you want to display a subscription box. I am creating a homepage so I will use a page with full width (without any sidebars)
Generateblocks use 4 blocks only: Container, Headline, Grid, Buttons so we will use these blocks to create a subscription box for our WordPress Website.
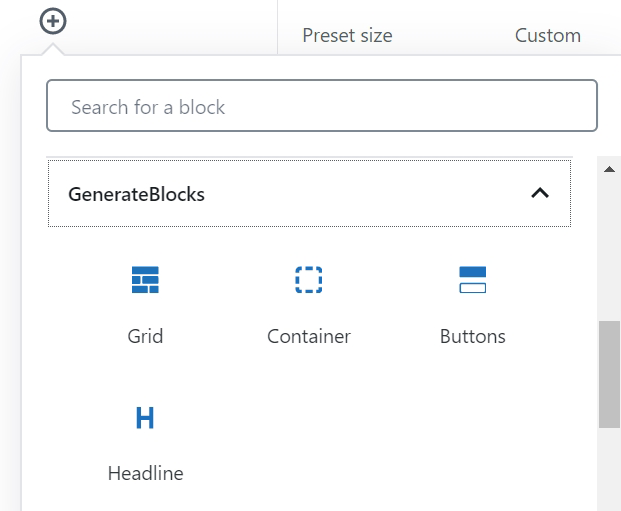
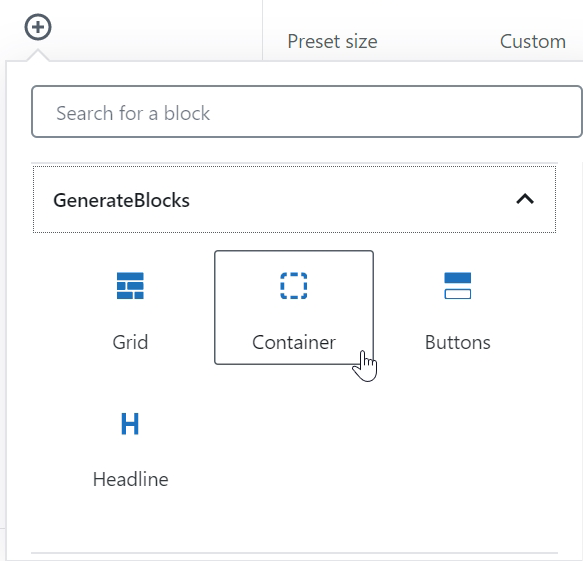
1.) Add a New Block: Click on Plus Sign (+) and Go to GenerateBlocks and Click on Container
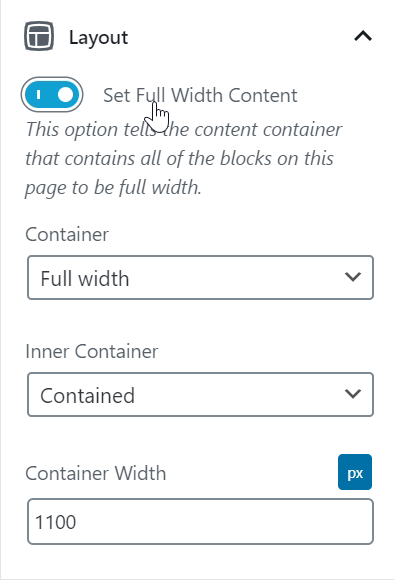
2.) Set a Full Width Content
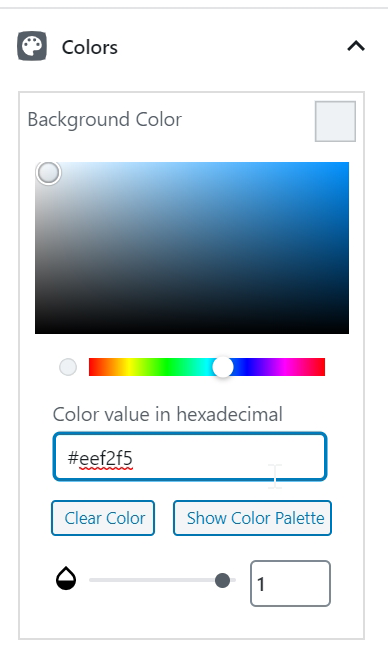
3.) Set Background Color
Choose any color you like to set it as background color. The color is for a whole container.
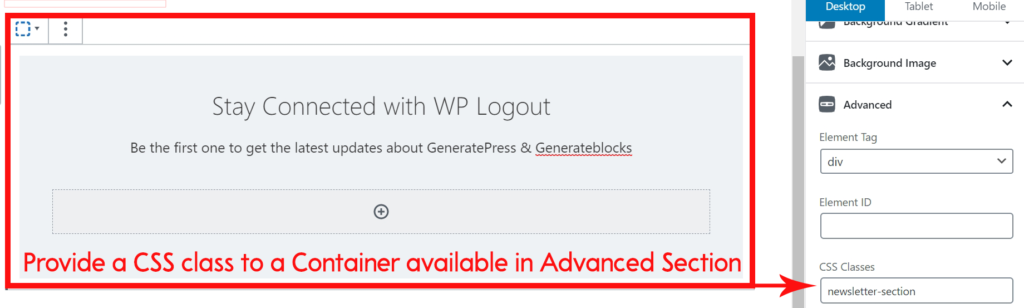
4.) Assign Class to a Container
Go to Advanced and assign a CSS Class newsletter-section to the whole container.
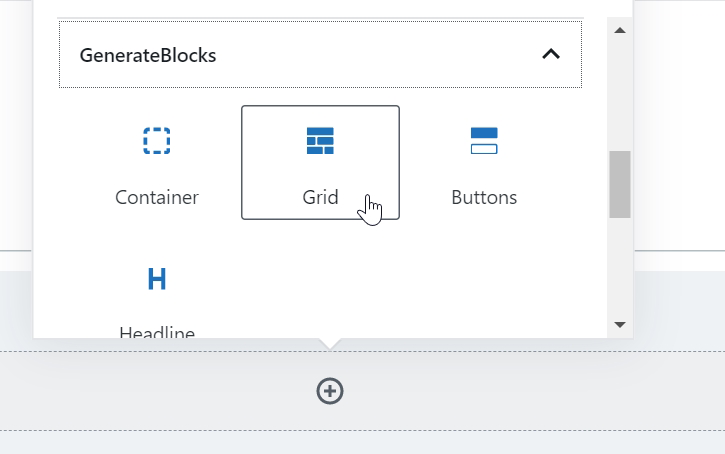
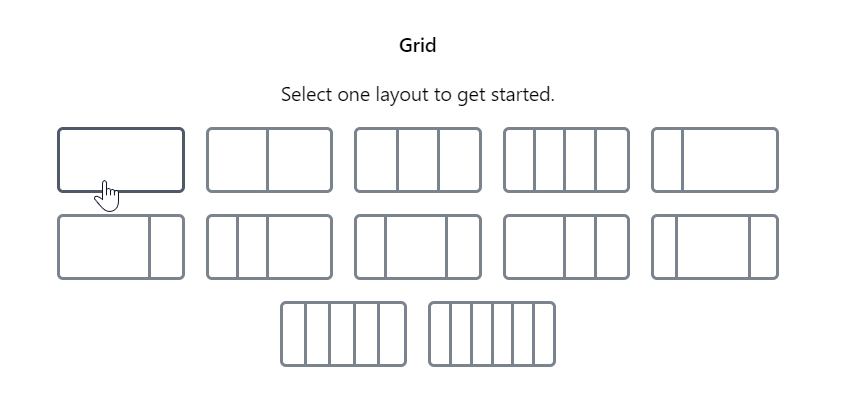
5.) Add Grid Block Inside Container
Click on Add Block and Select Full Width Generateblocks Grid.
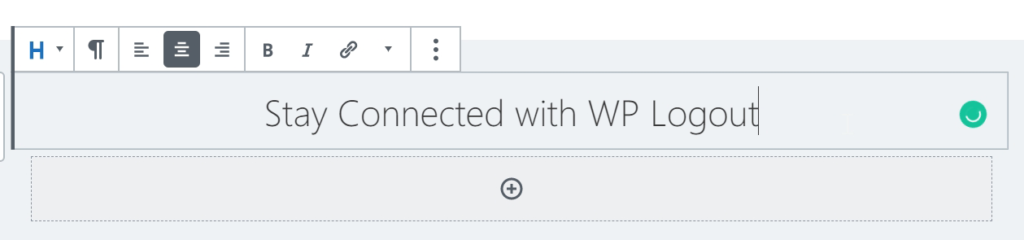
6.) Now Add Headline (Not to get confuse with Heading)
The headline is one of the four blocks of Generateblocks. so don’t get confused with the default Heading block.
Write your text as in screenshot and align text to center the whole headline.
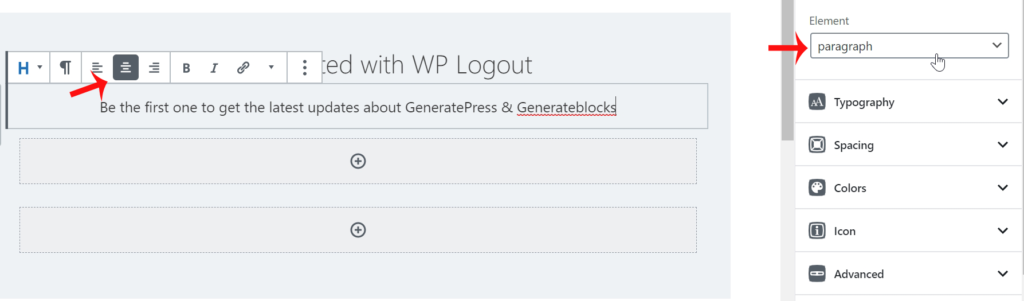
7.) Write a Paragraph Under Headline
Again Click on Add Block and select Headline and under Element choose Paragraph and write your Text as in screenshot with aligning the text to the center.
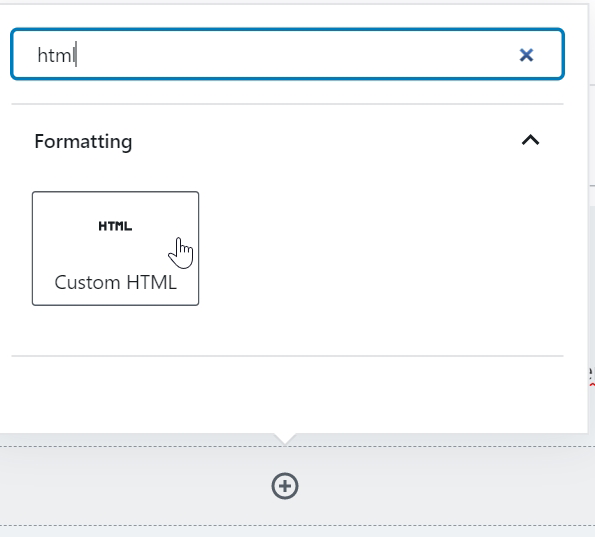
8.) Add Custom HTML Block
Now click on Add block and add Custom HTML block to insert the code. Copy and paste the below code within the Custom HTML.
Replace action URL (#) with the above form URL generated by MailChimp.
<!-- Begin Mailchimp Signup Form -->
<div id="mc_embed_signup" class="newsletter-section">
<form action="#" method="post" id="mc-embedded-subscribe-form" name="mc-embedded-subscribe-form" class="validate" novalidate="">
<div id="mc_embed_signup_scroll">
<div class="mc-field-group">
	<input type="email" value="" name="EMAIL" class="required email" id="mce-EMAIL" aria-required="true" placeholder="Enter your email here">
<input type="submit" value="Subscribe" name="subscribe" id="mc-embedded-subscribe" class="button">
</div>
	<div id="mce-responses" class="clear">
		<div class="response" id="mce-error-response" style="display:none"></div>
		<div class="response" id="mce-success-response" style="display:none"></div>
	</div>    <!-- real people should not fill this in and expect good things - do not remove this or risk form bot signups-->
    <div style="position: absolute; left: -5000px;" aria-hidden="true"><input type="text" name="b_d8de62ebda36d95ee82d4f403_dd12e2da6f" tabindex="-1" value=""></div>
    </div>
</form>
</div>
<script type="text/javascript" src="//s3.amazonaws.com/downloads.mailchimp.com/js/mc-validate.js"></script><script type="text/javascript">(function($) {window.fnames = new Array(); window.ftypes = new Array();fnames[0]='EMAIL';ftypes[0]='email';fnames[1]='FNAME';ftypes[1]='text';fnames[2]='LNAME';ftypes[2]='text';fnames[3]='ADDRESS';ftypes[3]='address';fnames[4]='PHONE';ftypes[4]='phone';fnames[5]='BIRTHDAY';ftypes[5]='birthday';}(jQuery));var $mcj = jQuery.noConflict(true);</script>
<!--End mc_embed_signup-->
3. Styling Subscription Box in Generateblocks using CSS
- Go to your Appearance > Customize.
- Go to Additional CSS.
- Copy and Paste the below Subscription Box CSS code.
- Hit Publish Button.
I have tested the following code with the full width without any sidebars so if you are using left or right sidebar then please adjust the code below to match your requirement.
.newsletter-section #mc_embed_signup {
text-align: center;
}
.mc-field-group {
display: flex;
flex-wrap: wrap;
justify-content: center;
}
@media (min-width: 768px) {
.mc-field-group {
padding: 0 250px;
}
}
.newsletter-section input[type="email"] {
padding: 15px 30px;
font-size: 20px;
border-top-right-radius: 0;
border-bottom-right-radius: 0;
border-right-width: 0;
}
.newsletter-section input[type="submit"] {
padding: 15px 30px;
border-top-left-radius: 0;
border-bottom-left-radius: 0;
}
@media (max-width: 768px) {
.mc-field-group {
flex-direction: column;
width: 100%;
}
}
@media (max-width: 768px) {
.newsletter-section input[type="email"] {
border-top-right-radius: 4px;
border-bottom-right-radius: 4px;
border-right-width: 1px;
}
}
@media (max-width: 768px) {
.mc-field-group input[type="email"] {
margin-bottom: 5px;
}
}
@media (max-width: 768px) {
.newsletter-section input[type="submit"] {
border-top-left-radius: 4px;
border-bottom-left-radius: 4px;
}
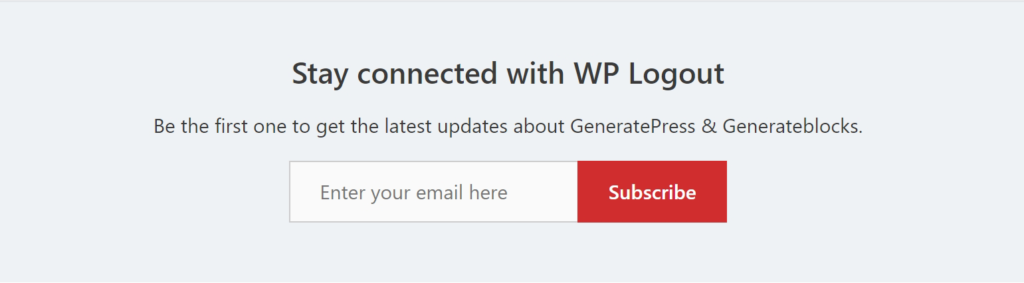
}4. Result
The subscription box in Generateblocks look like this
Bottom Line
This is how you can Create Subscription Box in Generateblocks without plugin. The whole process is easy and simple, you can implement it easy in your blog too.
Generateblocks is great plugin to start with and it is compatible to almost every WordPress Theme.
If you have feedback/queries then please don’t forget to comment below.
Thanks for this, why do you need a plugin when we can do it this way haha, awesome, thank you so much man!
Cheers
Cheers mate 🙂
Thanks for the tutorial. Everything working well at my end.
*Update
The subscription box is padded into my blog footer area. How do I fix this problem? My URL is obodiary dot com.
Hi, Play with CSS. I hope you can do it.
Thanks
Hi Suraj,
You have earned another fan! absolutely love your guides.
I myself consider as pro for generatepress but you are on GOD level!
Recently I have trying to avoid elementor for one my upcoming projects so your tuts have been much help.
One question I mainly use automizy instead of mailchimp. Is it possible to get form customized for it?
Thanks
Hi Alston,
I haven’t used automizy till date but I think you can easily customize it.
You simply need to know CSS code for customization.
Thanks
Bro, your tutorials are awesome.
What are a great content!
I love the Generatepress theme but your tutorials make it even more.
Question: How do you add border radius and box-shadow to all of the images you use in your blog posts?
It looks great.
Thanks in advanced
Hi Kwabs,
You can simply use CSS code for box-shadow and border radius.
Thanks
What!! It’s Awesome…!! I have used a plugin for this, but after watching your content, I really become your big fan because I love Generate Press Theme and you can share a lot of generating press relevant ideas.
Big Thank You By Droidgig, Sir…
Happy to help, cheers!!
Hi Suraj,
Can i call this popup from the footer notification bar button , means on a click event …
Please let me know what needs to be done for that as once popup is created and notification bar how to call popup from the notification bar
Hi Annu,
I haven’t tried this yet, I may try it later but in the mean time you can test in your backend and let me know the result.
Thanks
Thanks for the prompt reply but i just want a hint from you how to go about it …
The I will try and let you know the results
Hi Suraj,
I am looking for more tutorials on GeneratePress. Please post more. And You’re awesome.
Thank you Vijay for the nice comment.
I will post more in my free time.
Thanks
Hi Suraj,
Great tutorial. I just want to add “FNAME” field as well. How can I do that? Also, can i make this form as a local pattern in Generateblocks so I can use it repetitively?
Thanks in advance.
Hi Ravi,
You can find FNAME setting in MailChimp too. Please check it.
Yes, you can use GeneratePress Element Hook or you can make it reusable. I have written so many tutorials about it. Please check my blog about Reusable block.
Thanks
Hi Suraj,
You are doing a great job by teaching WP tutorials and in particular Generatepress them.
I use the Generatepress theme, but my site name doesn’t appear above search results on Google search. But instead, my site URL will appear.
Example: generatepress.com will appear above instead of “GeneratePress”.
Do you know how I can solve this?
Hi Azubuike,
If it’s new website then it will take time.
Let me know your website URL.
Thanks