In this tutorial, we will try to add pricing table in WordPress using GenerateBlocks. We are going to use the GenerateBlocks plugin to create a pricing table where you don’t require any other pricing table plugin.
With GeneratBlocks you can create awesome design including hero pages, landing pages, subscription pages, etc, or even a whole website. so, why not use a multipurpose plugin rather one specific plugin.
In this guide, you will also learn to
- Use Container and Grid.
- Use Buttons and Headline.
- Add Pricing Table with Gradient Design.
- Create a Responsive Pricing Table in WordPress.
- So on…
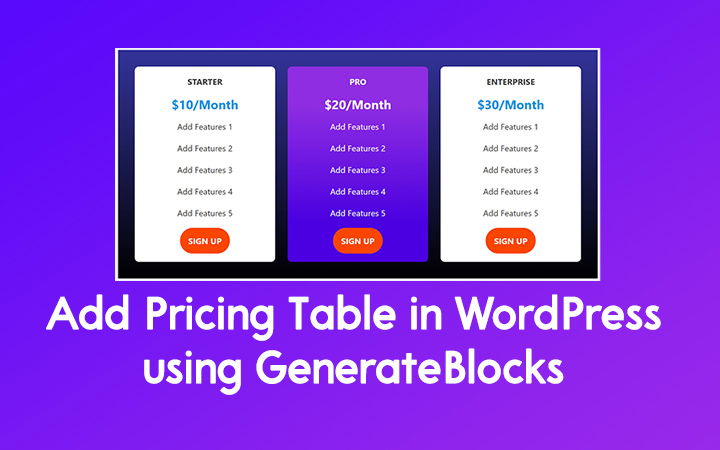
Create Pricing Table in WordPress using GenerateBlocks
Here we are going to create a free pricing table which will be simple. Moreover, you can also design an advanced pricing table using GenerateBlocks.
I am using GenerateBlocks with GeneratePress WordPress Theme, also it is compatible with any other themes, so try it.
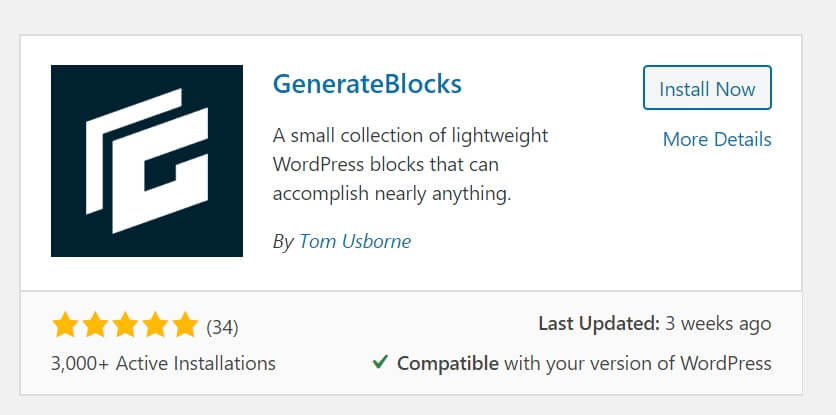
1. Install GenerateBlocks Plugin
As I have already written GenerateBlocks Review, and you can simply install the plugin by visiting your Dashboard > Plugins > Add New.
Search GenerateBlocks, Install and Activate the plugin.
2. Add a Container for Pricing Table
After installing the Generateblocks plugin, go the page or post where you want to add the pricing table.
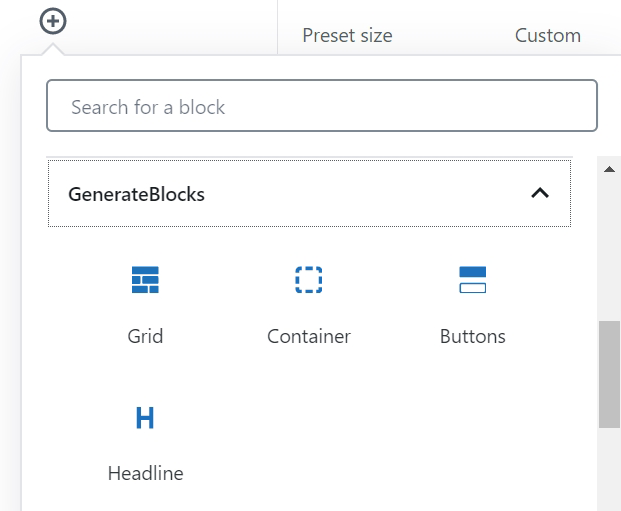
Now, you will see an additional blocks like Container, Grid, Headline, Buttons in Block Editor.
Here, we are going to use all of them in this pricing table tutorial. So, let’s start with the Container block.
I am using full width to add a pricing table i.e. I have disabled sidebars so that we can enjoy a free full-width pricing table.
Click on Add Block Icon and Add a Container Block.
Now, you can add Background Color, Image or Background Gradient for the Container
Go to the block sidebar where you can use different settings for Container, Grid, Buttons, Headline, etc. like Colors, Spacing, Typography.
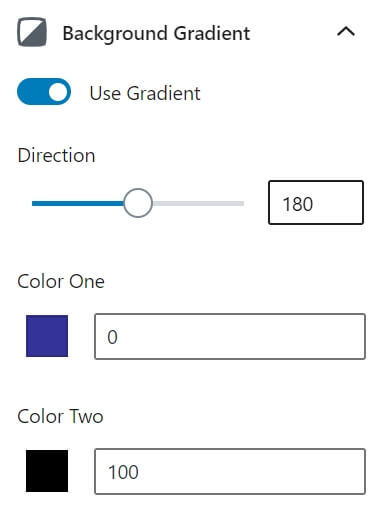
Here, I am going to add background gradient.
Enable Use Gradient Option, Direction: 180, Color One: #333399 with stop position 0%, Color Two: #000000 with stop position 100%. Use full opacity for the color.
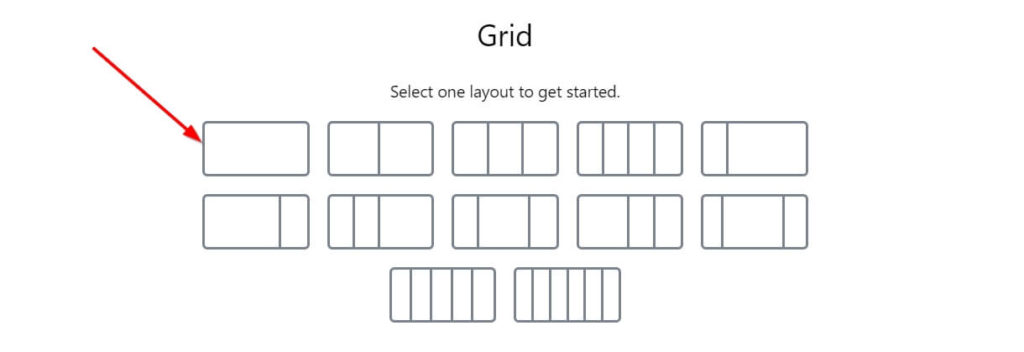
3. Add Grid Layout
You can add either 3, 4 or 5 column grid layout, it’s your choice. I am adding a 3 column grid for the pricing table.
Add a New Single Column Grid Inside the Container, we will duplicate the grid into 3 Column Grid Layout later after styling the single grid
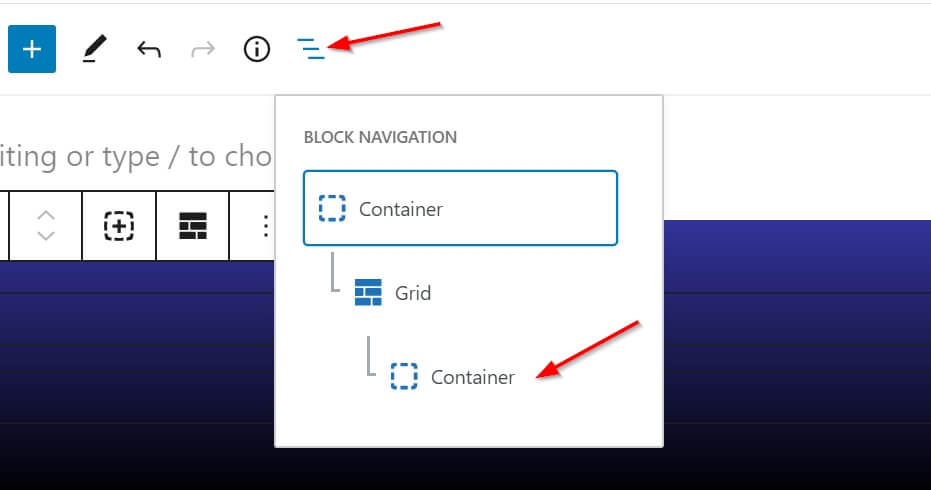
Now, we are going to style the single column grid. Go to Container inside the Grid (not the main container).
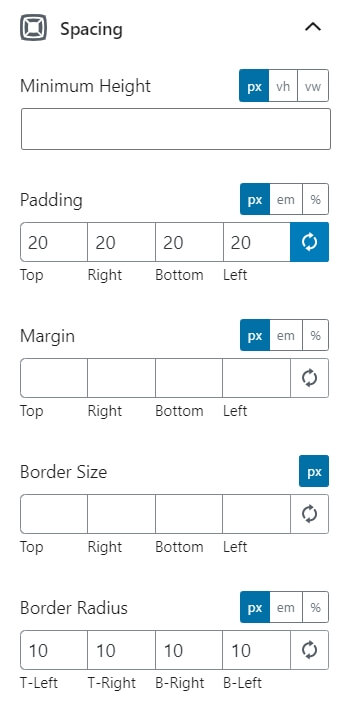
Now, Let’s add a Background color for the grid. I am going to use White Color.

Go to Spacing Section and use Padding and Border-Radius for the block.
Now, use a Headline block (not to get confused with Headings).
Add a Title using Headline. so in Headline, use paragraph Element.
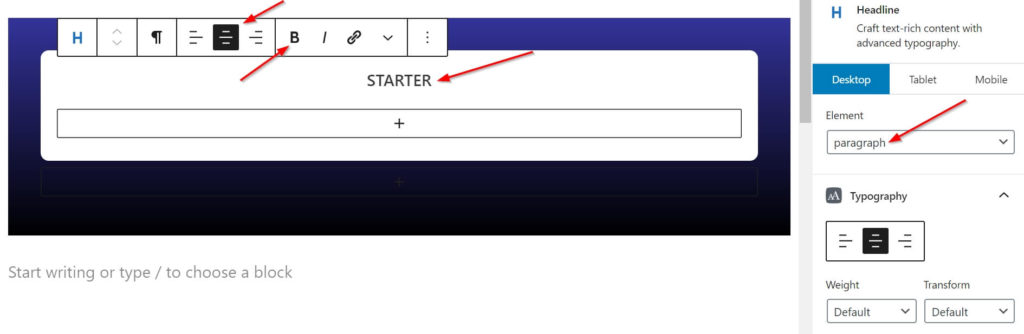
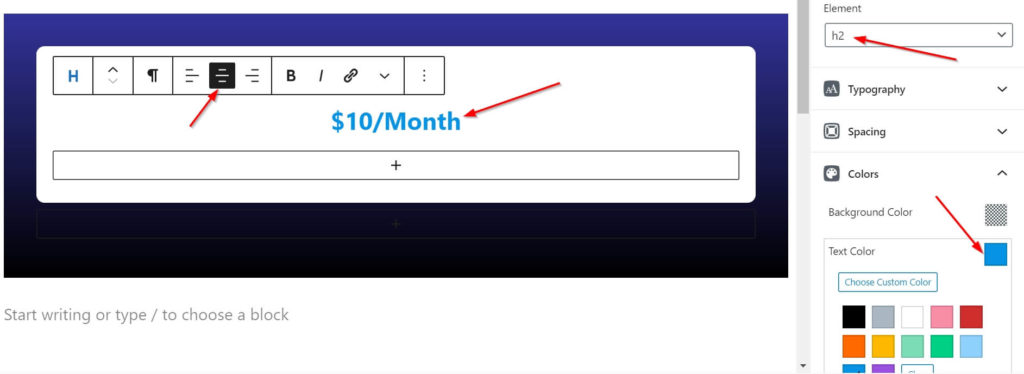
Add a Price Under Title using Headline. We are going to use the H2 element from Headline Block.
So, Click the + icon and add a new headline block and add Text-Color. I am using a blue color.
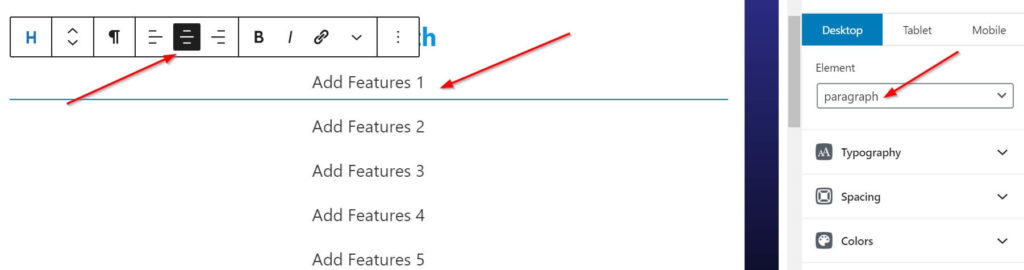
Now, List the features in your pricing table.
Here, we are going to use paragraph element from Headline block (not from Headings)
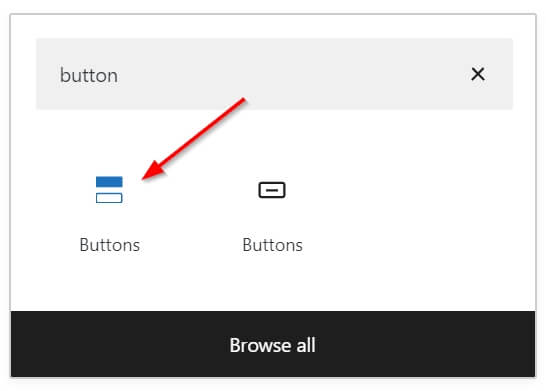
Now, add a CTA button so that you can lead use to the signup page with hyperlink.
We will use Buttons from GenerateBlocks so don’t get confused with Gutenberg block Buttons.

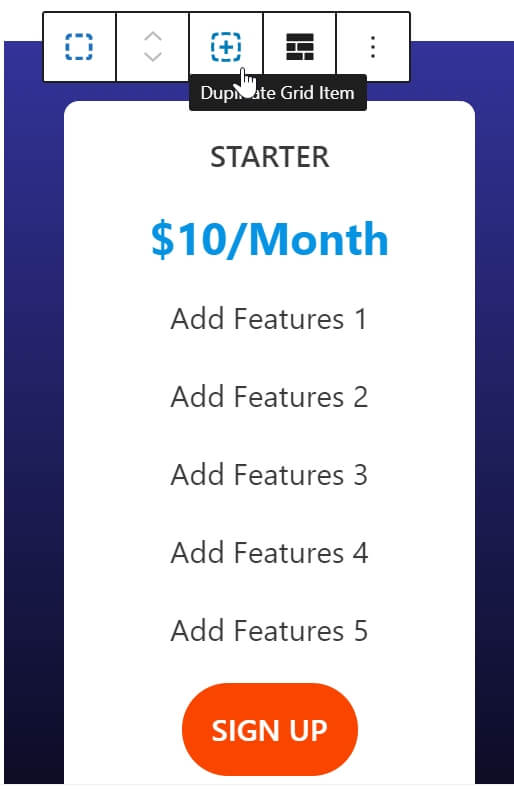
We have finished creating a layout for the pricing table. Now, let’s convert it into a 3-column grid layout.
Go to Block Navigation and Click on Container inside the Grid.
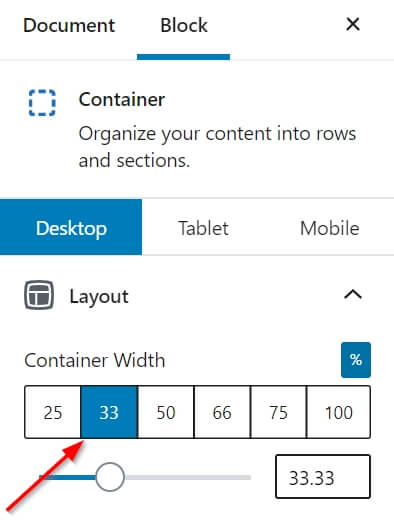
Since, we want to convert our single grid layout into 3-column grid and the single column grid is taking 100% width so, to convert into 3-column grid, we will use 33.33% container width for each of 3 grid.
After this, we are going to duplicate the first grid into 2 more grid so that we can have a 3-column grid layout.
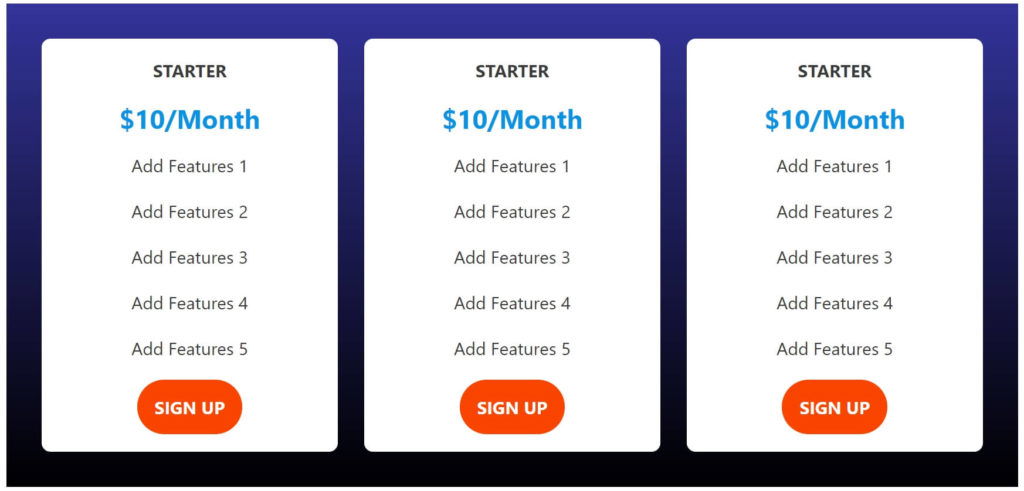
Now, Our 3-column Grid block looks like this, here we will edit more and make one final pricing table.
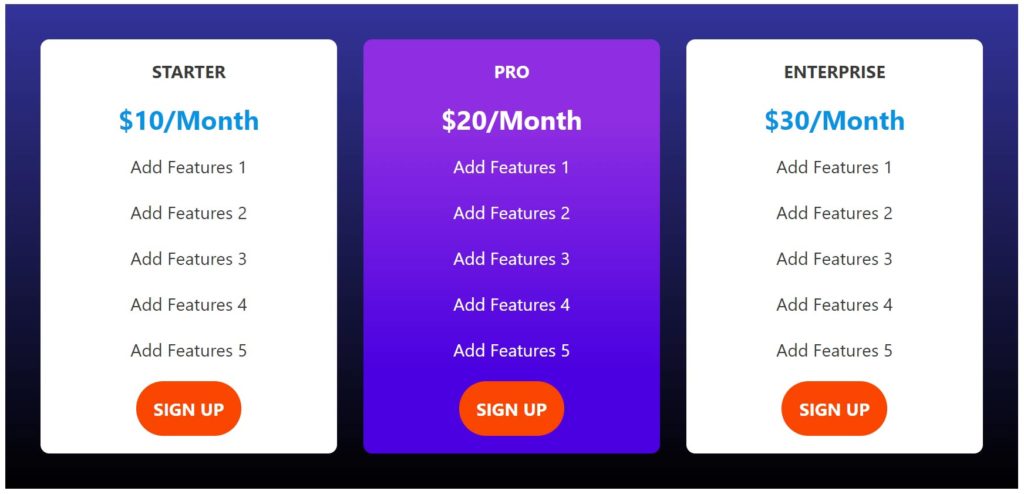
Let’s edit the middle pricing table. Change the title and price. Also, we will add a Background Gradient.
Go to the middle table and Enable Use Gradient from Background Gradient Option, Direction: 180, Color One: #8e2de2 with stop position 20%, Color Two: #4a00e0 with stop position 80%. Use full opacity for the color and use text-color as white.

For the last column pricing table, simple change the title and the price.
4. Result
The 3-Column Grid pricing table in WordPress looks like the screenshot below.
At the End
This is a simple way to add free pricing table in WordPress using Generateblocks. You can change the layout using your own style or even you can change this layout from 3-Column Grid Layout to 4-Column Grid Layout.
You can also download the pricing table for WordPress JSON file and import it into reusable block and use it into your website.
Hey Suraj.. long time no update, no more new tutorial???
Hi Bimol, I am busy with my exam. I will publish soon
Thank you
We appreciate your effort. Good luck in your exam.
Thanks
I want to delete only the CreativeWork schema (not all schemas). Theme generatepress.
Before adding the following code, please research yourself.
Add add_filter( ‘generate_schema_type’, ‘__return_false’ ); as PHP code
Thanks
Hi, Suraj which SEO plugin is best rank math or yoast?? please answer?
Hi Nilu,
There are mixed reviews on both Yoast and Rank Math SEO Plugins. You get most of the Yoast Premium version features in Rank Math plugin for free and furthermore, Rank Math is coming up with pro versions too. I am using Yoast in my blog since they are old and experience in the field of SEO.
It’s your choice to choose the plugin.
Thanks
Hi. Thanks for the post. I’ve another question not related though. When I click the Read more link from the Blog section I’m getting this appended to the URL –
mywebsite/my_post/#more-2254
1. Why is the #more?
2. Is it possible to get rid of this?
3. Should I remove it or keep it?
Thanks.
You can leave as it is or you can simply remove it.
If you are using child theme then you can paste the following code in the functions.php
or Install Code Snippets plugin and paste the following and hit the activate button.
add_filter( 'generate_more_jump','generate_disable_more_jump' ); function generate_disable_more_jump() { return ''; }Thanks, Suraj. I’ve another request for you. It would be great if you can help me with this.
I am trying to make my sidebar Recent Post as same as windowsedition[dot]com’s POPULAR POST. But I am struggling to do so.
Can you please take a look and give me the CSS for this? So, that I can have the same Recent post style as this site.
Thanks in advance.
Hi Pintu,
You can use border and background CSS property to create it.
Thanks
Hi, Suraj How to show “Notify me for reply” check box? like wplogout??
Hello Meagh,
Use Comment Reply Email Notification Plugin
Thanks
Hello Suraj, are you using Yoast free plugin or Yoast premium???
Hi Neetin,
I am using the free version of Yoast Plugin.
Thanks